Welcome to our Stamp Of The Month Blog Hop!! We are featuring August’s SOTM, What A Hoot, a set of 17 images. I am so excited to be joining almost 70 CTMH Independent Consultants this month!! If you’ve come from Jean McNulty’s Blog you are in the right place! If you’re starting here WELCOME! This blog hop is a big circle, so you can start here and work all the way around. Just click on the link at the bottom of each blog post to move onto the next one!! If you happen to get lost there is a full list of participants on Melinda’s Blog.
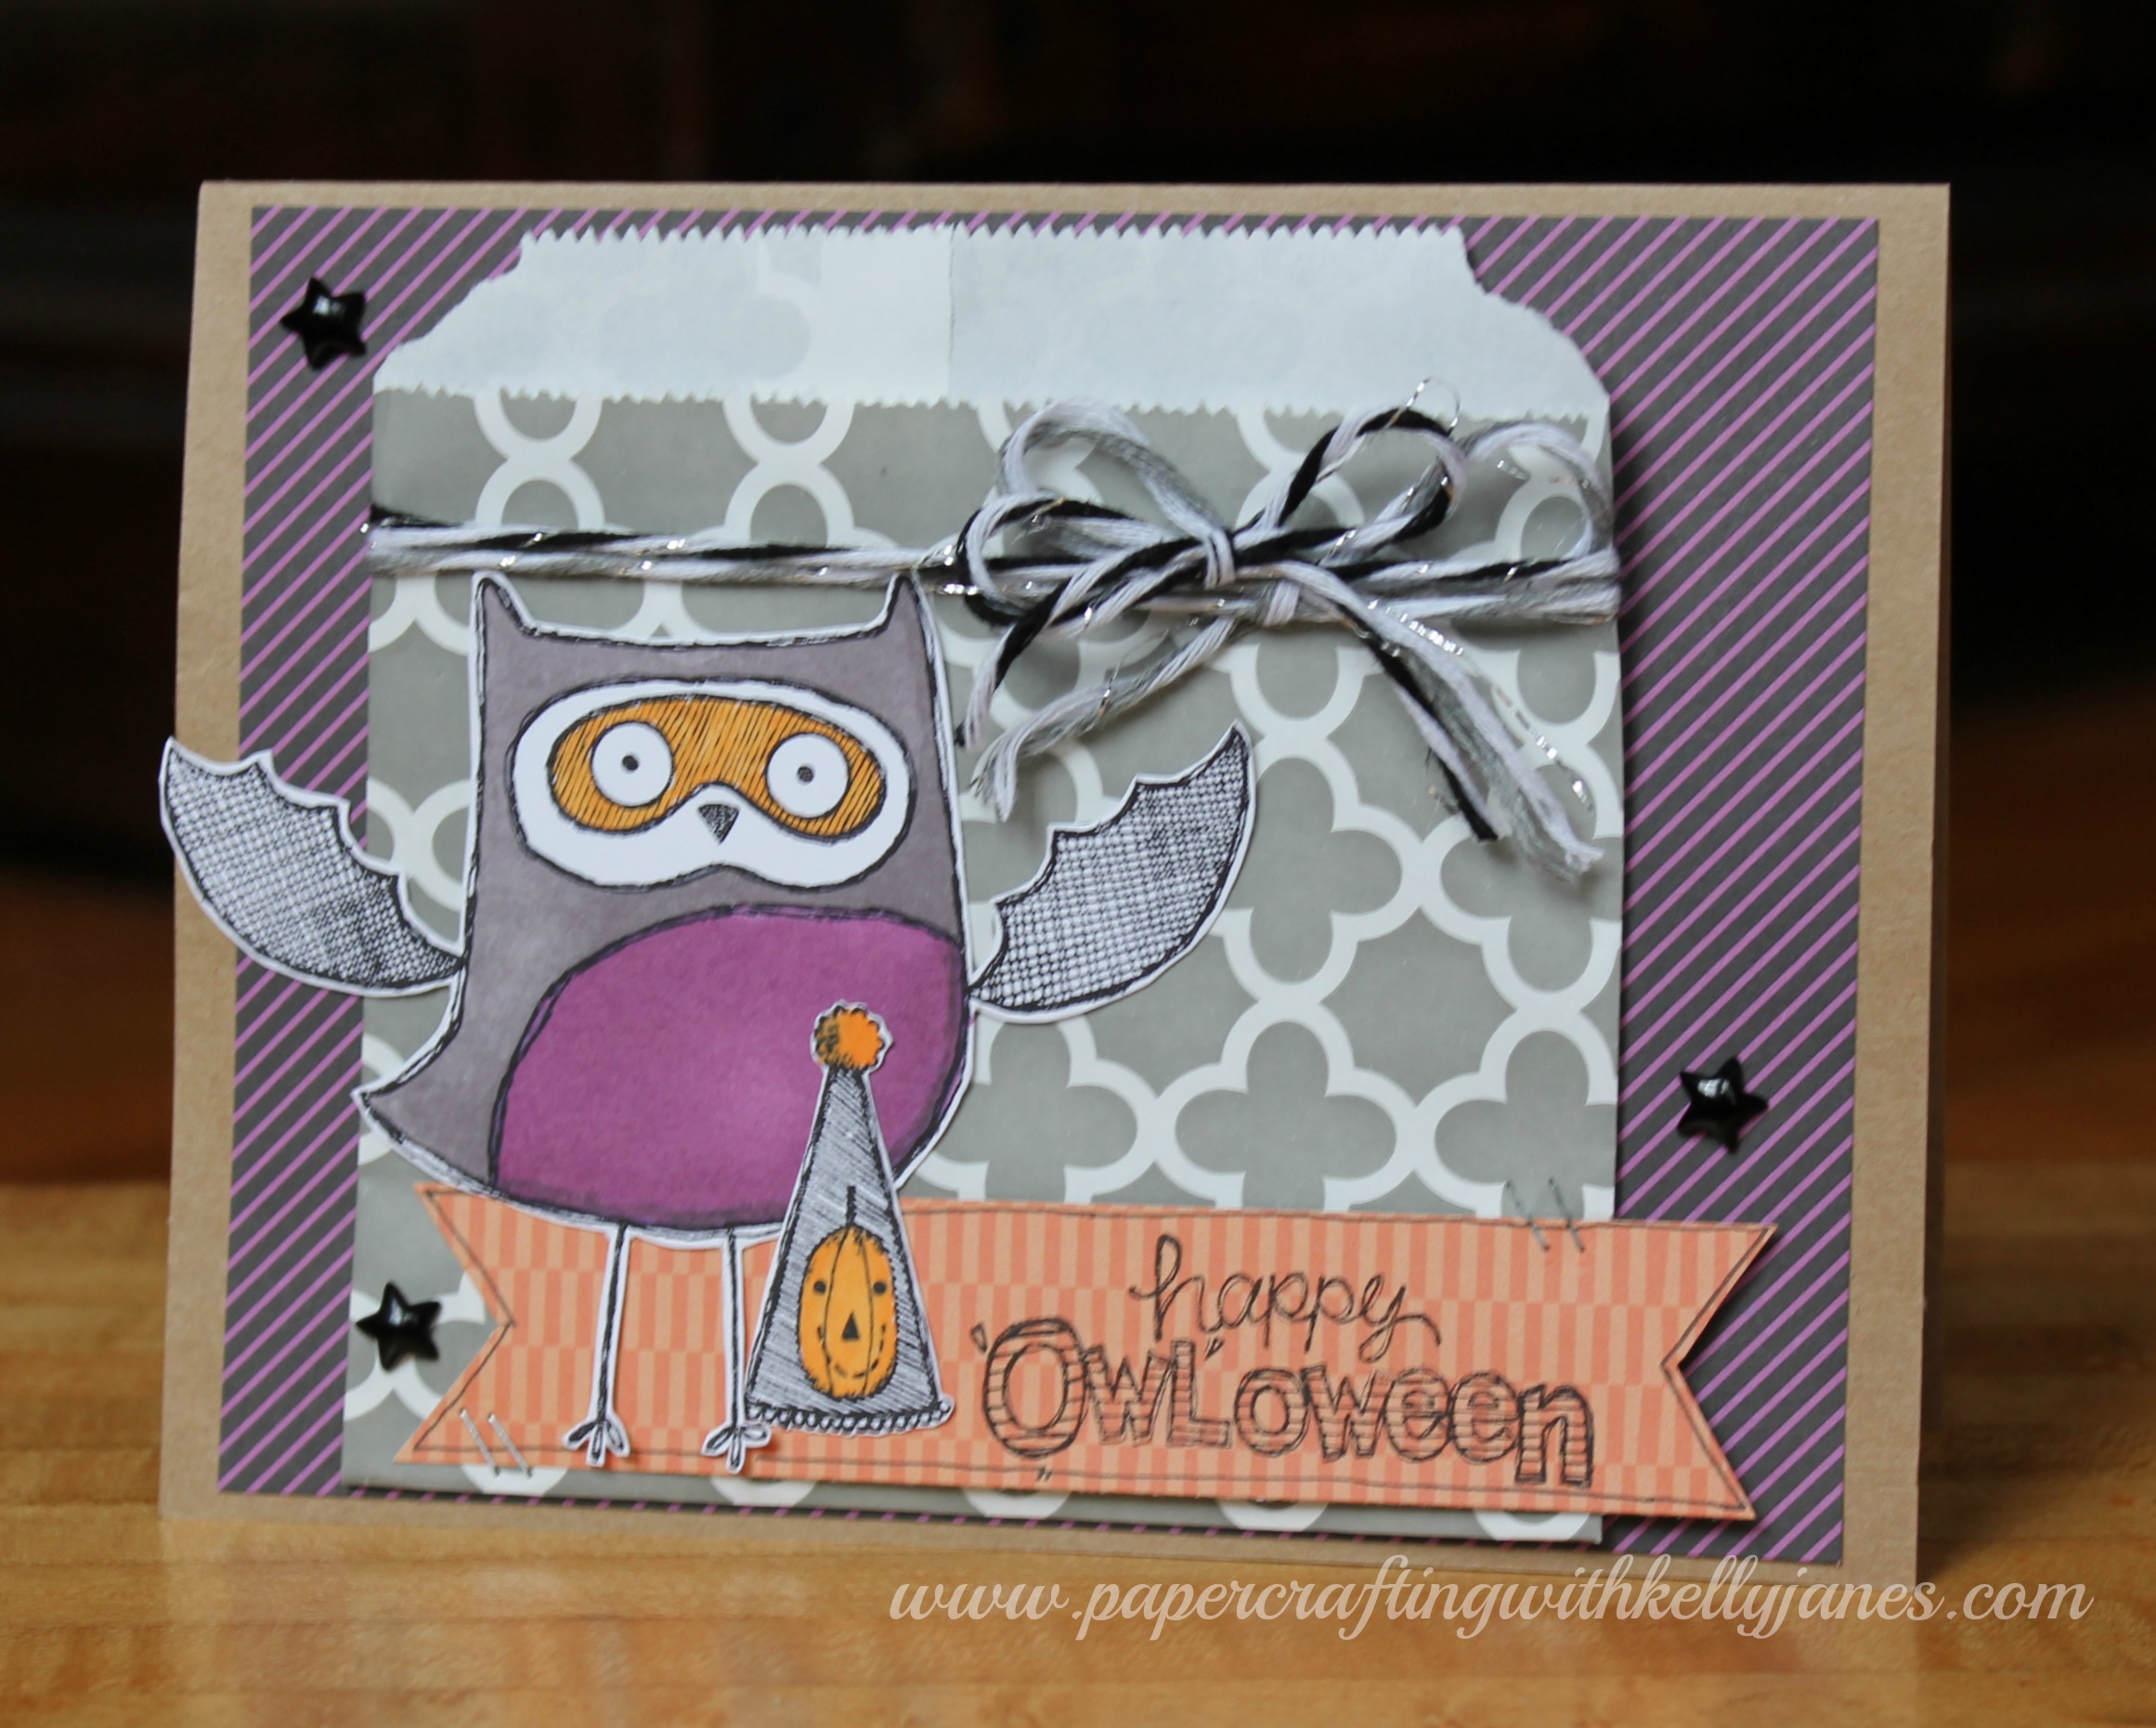
I came across this pin by Sarah Webb, and loved the idea of combining a card and a treat bag! It will be perfect to throw in my son’s lunch box for a Halloween Treat. {Can I insert a little tear at the thought of throwing anything in my son’s lunchbox?!? He will start all day kindergarten in just a couple weeks, and since he’s an only child I’m going to find myself alone on my day off work!!}
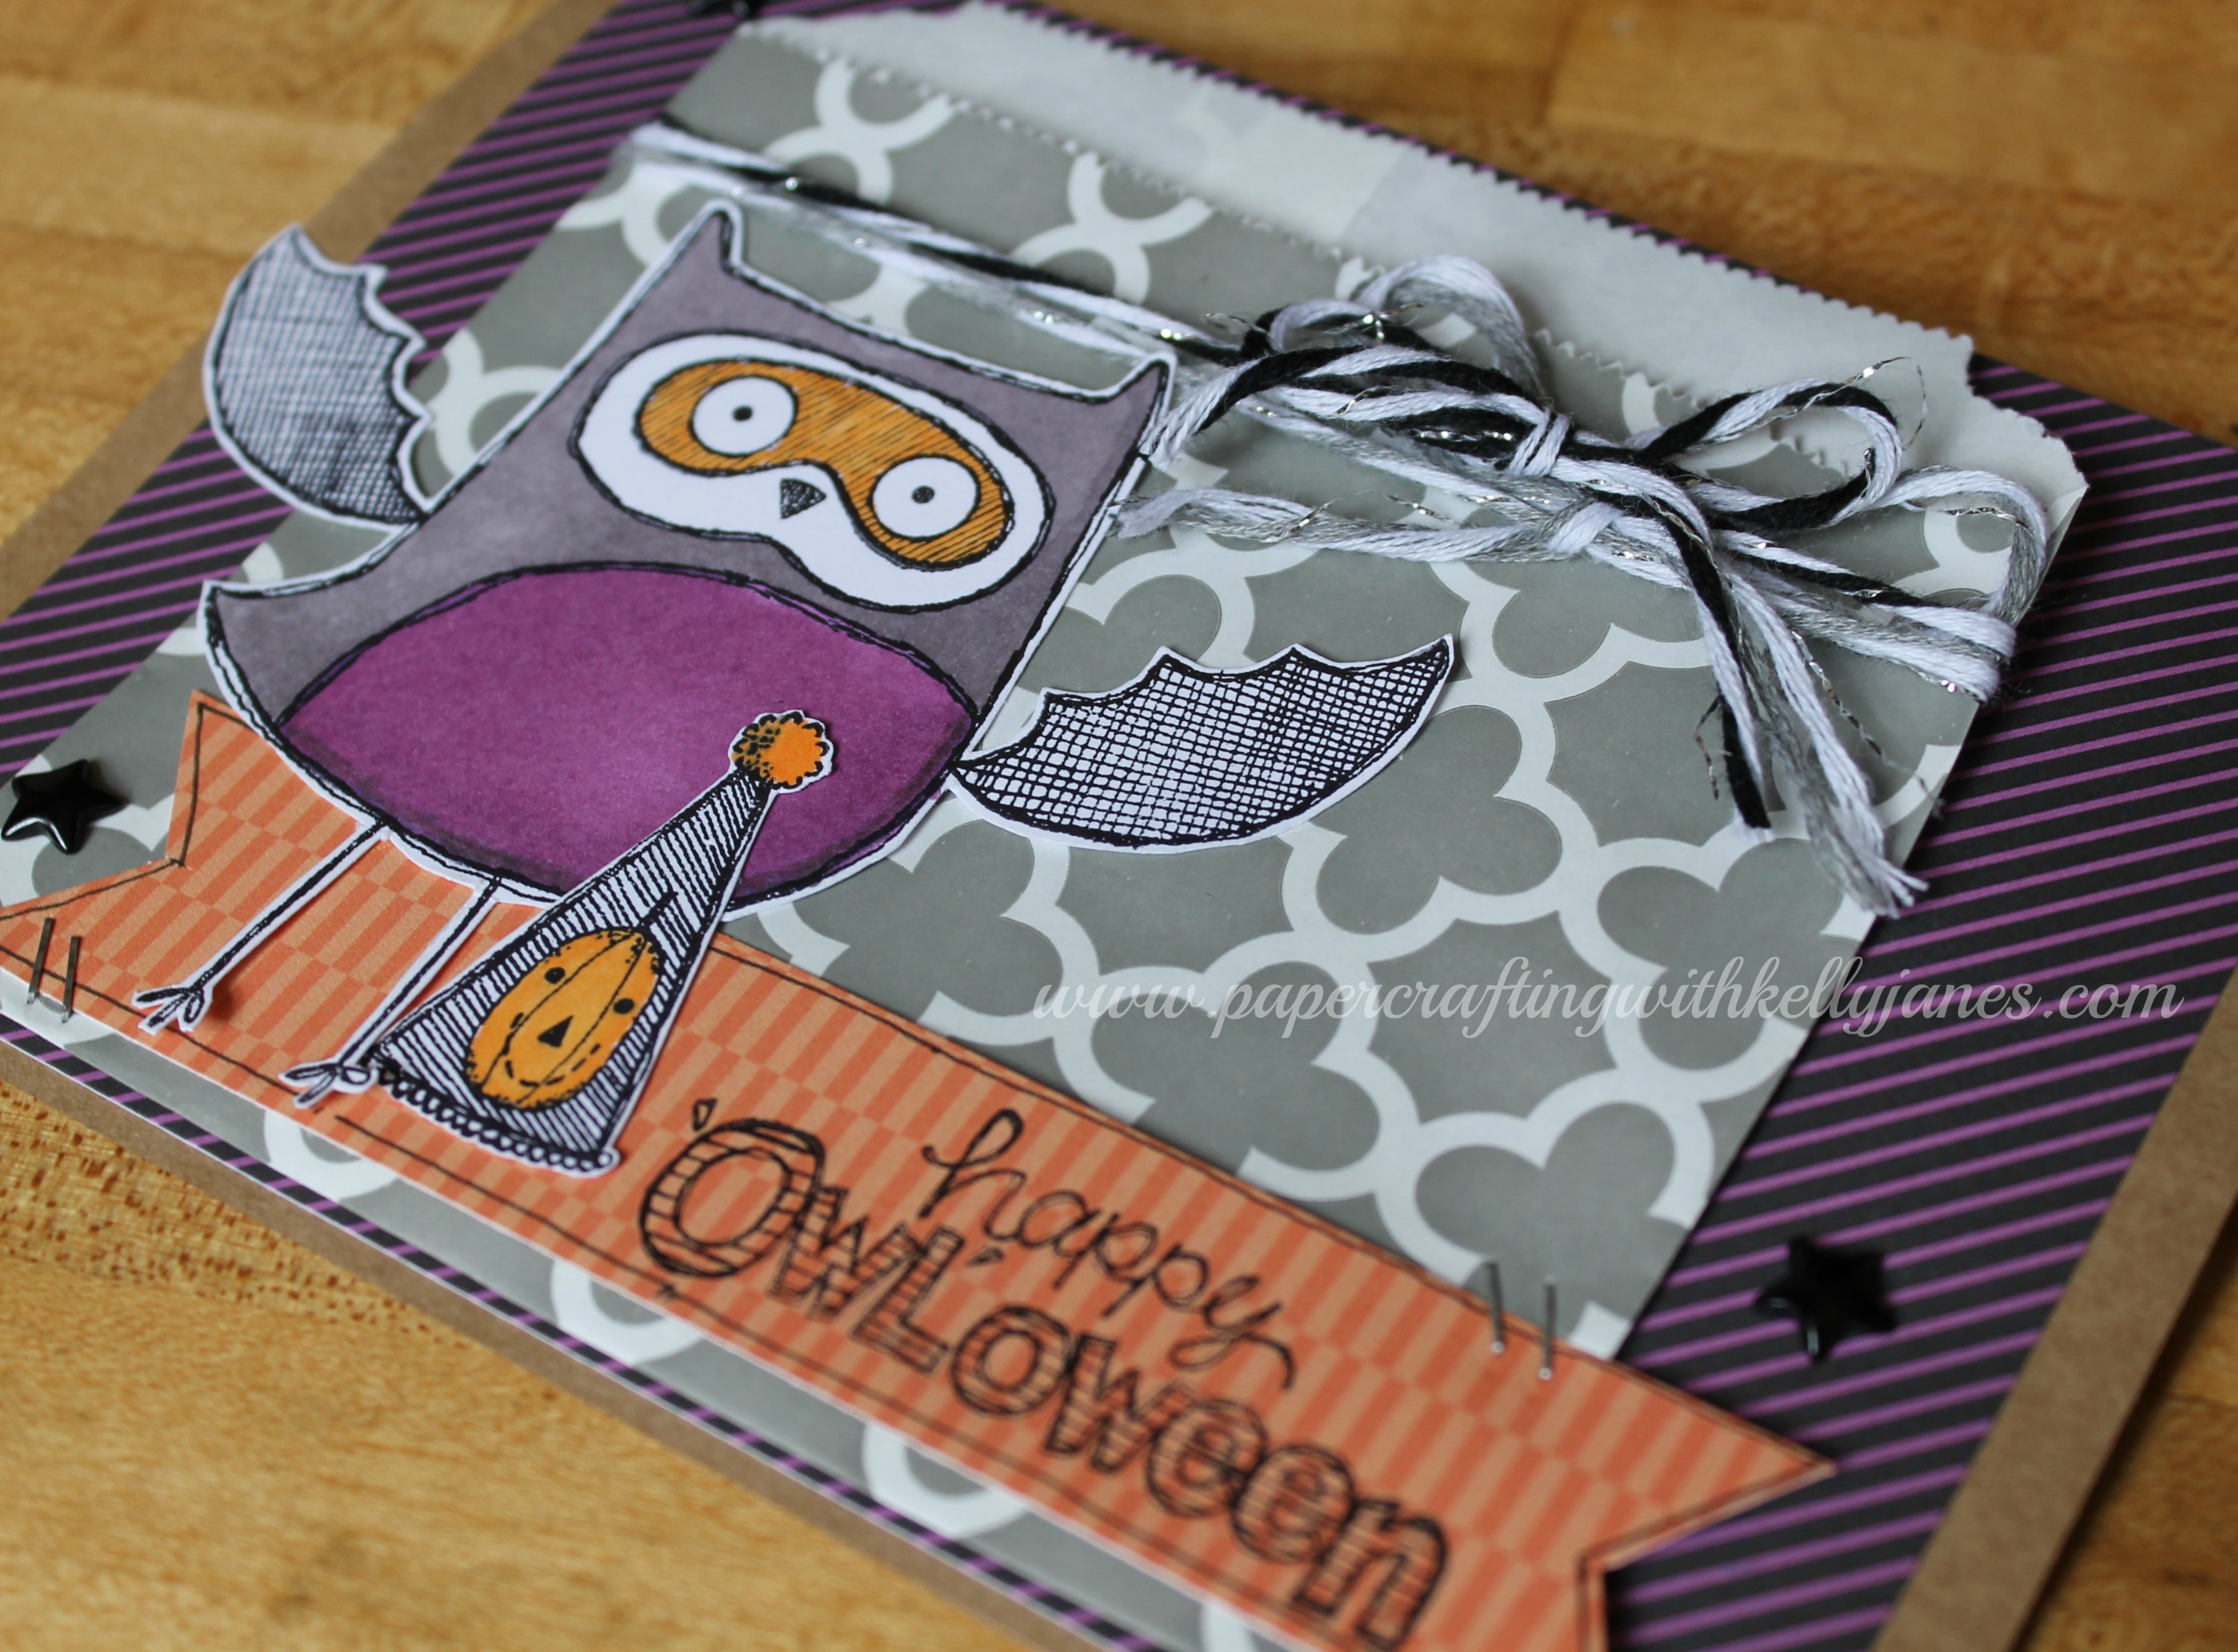
Starting with a Kraft Cardstock base and added a layer of {NEW} Scaredy Cat Paper Packet B&T Duos™ followed by a {NEW} Designer Creations Slate Paper Bag. I then used August’s SOTM, What A Hoot, owl image, Halloween hat, and sentiment in Archival Exclusive Black Ink™. I colored the stamped image with {NEW} ShinHan™ Touch Twin™ Markers. I also added a couple strands of Neutral Metallic Baker’s Twine and adding a few black stars from the {NEW} Scaredy Cat Assortment. I used the {NEW} Mini Stapler to attach the sentiment banner to the card. I wanted to show you how fantastic the {NEW} Designer Creations Paper Bags are for treats, cookies, candies, etc BUT our snack cabinet is bare at the moment!! I will be sure to throw one of my son’s faves inside the paper bag on Halloween!!!
TIPS & TRICKS
#1. Because the Designer Creations Bags are made of paper they are easy to trim to the size you need. The bag I used on this card was initially too long, so I just used my paper trimmer to cut it to the appropriate length & then used a scoreboard to make an even score line. I then folded the bag at the scoreline & resealed the base of the bag together with tape runner adhesive.
#2. The awesome doodiliness {is that a word!?!?} of this stamp set makes it perfect to add a little doodling of your own. Around the edge of the orange B&T I used my journaling pen and added a little extra fun!!
#3. Remember there are other ways than adhesive to secure items to your card! I’m in LOVE with the {NEW} Mini Stapler!! It helps add so much character to the card or any papercrafting project!

Remember this stamp set is only available until August 31!! Contact your CTMH consultant to find out how you can get this stamp set at a discount!! Now hop on over to Donna Digby’s Blog to see what she has created with this fun stamp set!! Be sure to visit all the consultants on this blog hop to get some great crafting ideas!!!
-Kelly