Changes | Starting Project Life

Hey friends! It’s crazy to think that we almost 2 full months into 2020 already! Whenever a new year comes around, I start thinking of my scrapbooking goals for the year. To give you a quick recap of my papercrafting history: I started scrapbooking in 2006ish…I started a scrapbook for my wedding around that time, but quickly fell out of the hobby and then picked it back up when my son was born in 2008. I scrapbooked 12×12 layouts from that time until 2013. From 2013 to 2016 I focused on card making. Then I made the transition to 12×12 scrapbook layouts until about 6 months ago, when I started Memory Planning. There seems to be an ebb and flow with my creative ambitions and I was feeling a shift yet again.

WHY I STOPPED MEMORY PLANNING…

Memory Planning was such a fun way of documenting our memories. In 6 months I had documented over 200 photos in a small album, but I felt I was lacking something. If you’ve followed me for any amount of time then you know my scrapbook style involves lots of dimension, layers and texture. It was difficult to do any of these things in a memory planner since it involves a disc system. I REALLY MISSED DIMENSIONAL EMBELLISHMENTS, but I loved the daily/weekly documenting involved in memory planning.

I started binge watching Heba Alsibai’s YouTube Channel and absolutely loved her Project Life! She was using chipboard, puffy stickers (2 things I ABSOLUTELY love) and still documenting in a weekly format. Project Life had already seemed dooming to me. Staying on top of printing pictures, keeping track of our stories, etc, but I realized I was doing all of these things for my memory planner. I already have a plan in place for printing/organizing my photos, I know how to keep track of our memories…so why not give Project Life a try?

I had thought about continuing to document in my Happy Planner until it was finished (June 2020), but I had 6 months fully completed and I wasn’t loving it the same as before. Why keep going? 6 months seemed like a good time to break-up. HA!


Now let me share with you my first spread of 2020.

12x12 Project Life using Citrus Twist Kits, The Cut Shoppe Cut Files and my stash

I’m 100% a product driven scrapbooker, so I decided that it was time to rejoin a kit club. After discussing with my good friend, Kira Ness, I decided on Citrus Twist Kits [which is what I used on this spread].

12x12 Project Life using Citrus Twist Kits, The Cut Shoppe Cut Files and my stash

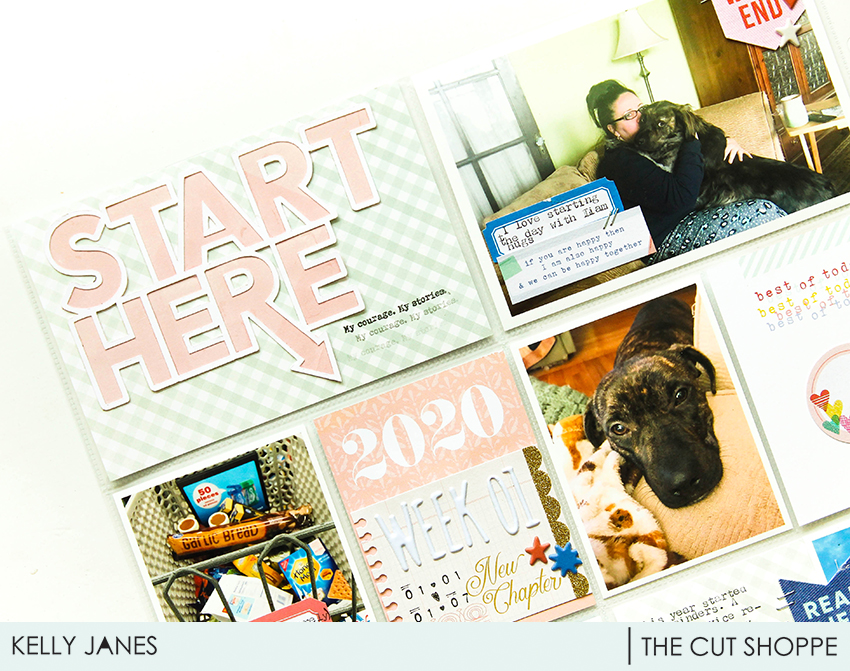
I also used the Start Here Cut File from The Cut Shoppe for my opening card [does that card have a name? Is it considered a title card even if it doesn’t have the week number on it?!]. I sized the Start Here to fit on a 4×6 card and then backed it with a light pink patterned paper. I love that the “R” in the cut file has an arrow that causes your eye to move down the spread.

12x12 Project Life using Citrus Twist Kits, The Cut Shoppe Cut Files and my stash

I layered embellishments from the Citrus Twist January Life Crafted Kit on cards. I also used puffy stickers and was SO HAPPY to be able to add a little dimension on a spread. Honestly, I can’t tell you how fulfilling it felt! HA!

12x12 Project Life using Citrus Twist Kits, The Cut Shoppe Cut Files and my stash

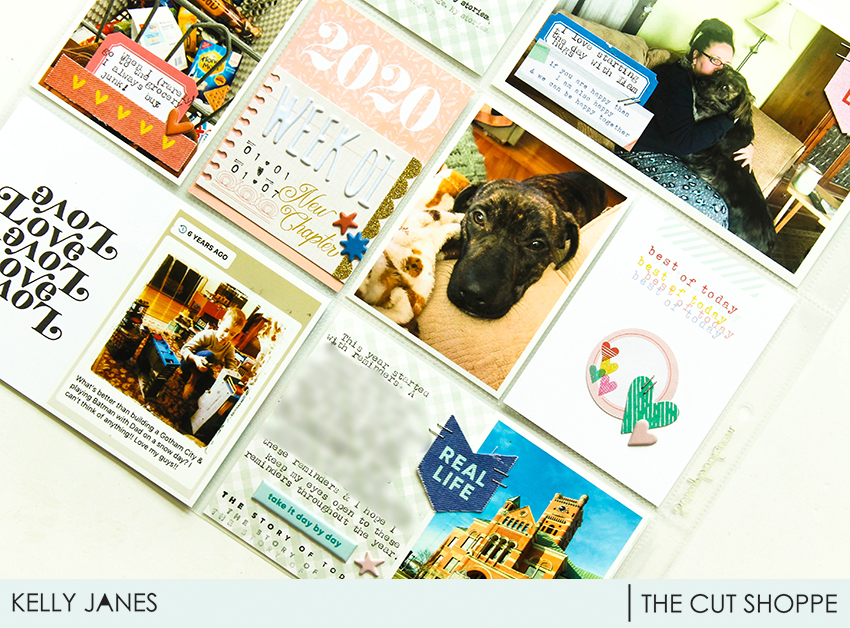
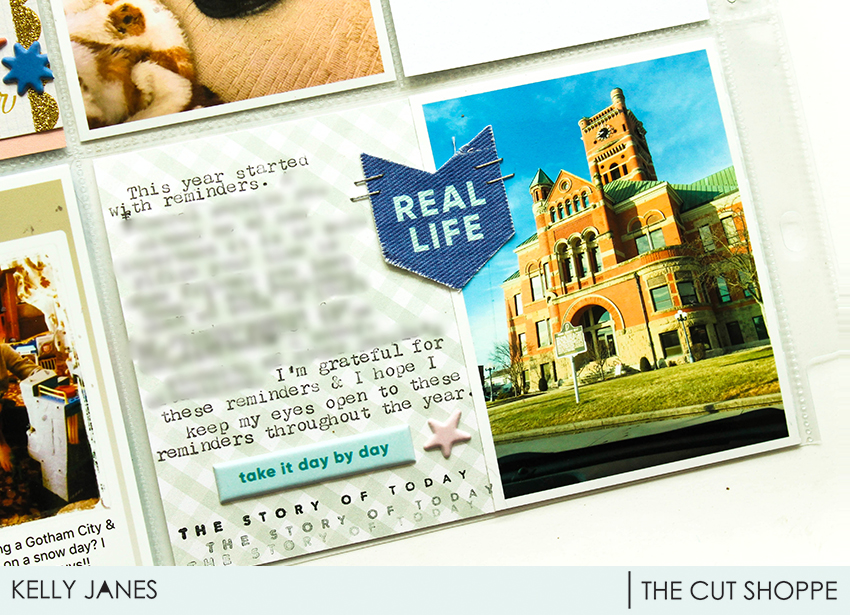
One of the things I loved about memory planning is the journaling. I typically don’t journal on my 12×12 scrapbook pages, so it was important to me to continue journaling in my Project Life. I used my WRMK Typecast Typewriter to add journaling to one of the cards and also to a couple of labels around the spread. SO. MUCH. FUN!

12x12 Project Life using Citrus Twist Kits, The Cut Shoppe Cut Files and my stash

I’m excited to see where Project Life takes me this year! I hope you’ll stay along for the ride!

Sun Tan | The Cut Shoppe

We were recently discussing Print Then Cut in The Cut Shoppe -Scrap Spot- Facebook Group. There were quite a few people who had never tried this feature and were curious how it worked or just wanted more detailed information. My friend & owner of The Cut Shoppe, Ashley Horton, and I are teaming up and creating tutorials showing how easy it is to use this feature. Ashley is a Silhouette Cameo user so her video will focus on how to use this feature using the Cameo. My blog post & video will focus on how to use this feature in Cricut Design Space.

12x12 scrapbook layout for The Cut Shoppe Design Team using the Summer Sizzle Print Then Cut & Bella Blvd Island Escape Collection.

Ashley designed this FREE Summer Sizzle Print Then Cut that is only available in The Cut Shoppe -Scrap Spot- Facebook Group, so be sure to head there to download a free copy. You can still use this printable even if you don’t own a die cut machine. Just print it out and then fussy cut all of those cute images!

I do have a step-by-step tutorial for Print Then Cut (PTC) included in the Process Video at the end of this blog post, but a PTC file is uploaded almost exactly the same as a regular cut file in Cricut Design Space. The only step that is different is at the very end. You will want to save it as a PTC file rather than a Cut File. One of the things I love about The Cut Shoppe is all files are on a transparent background so it makes uploading into Design Space a breeze!

12x12 scrapbook layout for The Cut Shoppe Design Team using the Summer Sizzle Print Then Cut & Bella Blvd Island Escape Collection.

For my layout today I cut a circle from the Full Circle Cut File on white cardstock. I then backed the cut file using the Tropical Bliss Patterned Paper from the Bella Blvd Island Escape Collection. PTC files are great to use as embellishments and the bonus is you will never run out! You just print another copy! I used multiple icons from The Cut Shoppe FREE Summer Sizzle Print Then Cut. I also used multiple Die Cuts and Chipboard Pieces from the same Bella Blvd Collection for additional embellishing.

12x12 scrapbook layout for The Cut Shoppe Design Team using the Summer Sizzle Print Then Cut & Bella Blvd Island Escape Collection.

Sometimes white cardstock feels too bright so I wanted to break that color up a bit before I adhered down my embellishments and photo. So, I added a splash of pink behind the embellishments using a pink mist from Shimmerz Paints. I was trying to figure out what I should do for a title & where my title placement should go. I decided to place it directly in the center of the cut file using a phrase and a banner from The Cut Shoppe Printable.

12x12 scrapbook layout for The Cut Shoppe Design Team using the Summer Sizzle Print Then Cut & Bella Blvd Island Escape Collection.

Now you can take a look at my process video that includes a Cricut Design Space tutorial showing you how to upload, print and cut this free printable from The Cut Shoppe.

Thanks so much for spending part of your day with my today! Please let me know if you have any questions about the Print Then Cut process!

This blog post contains affiliate links. This means I will receive a commission (at no cost to you) from items that are purchased from these affiliate links.