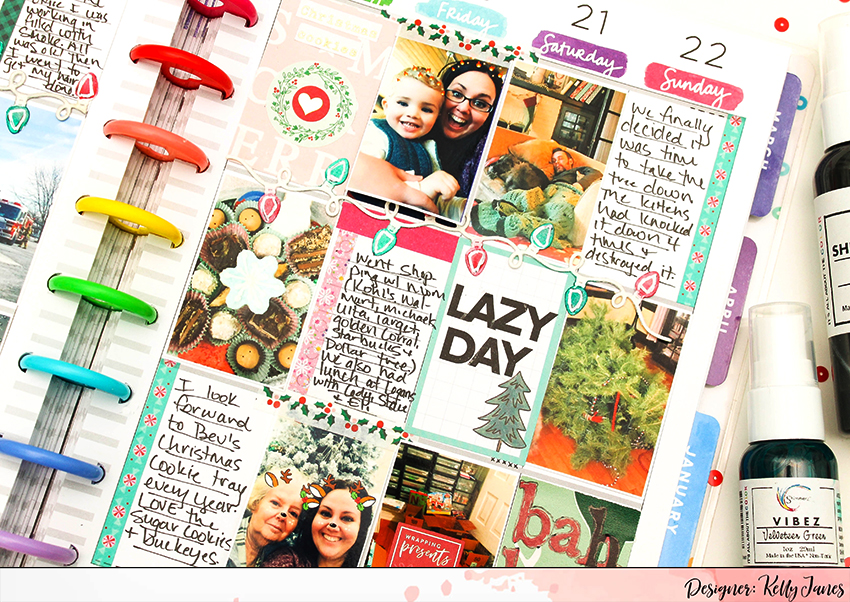
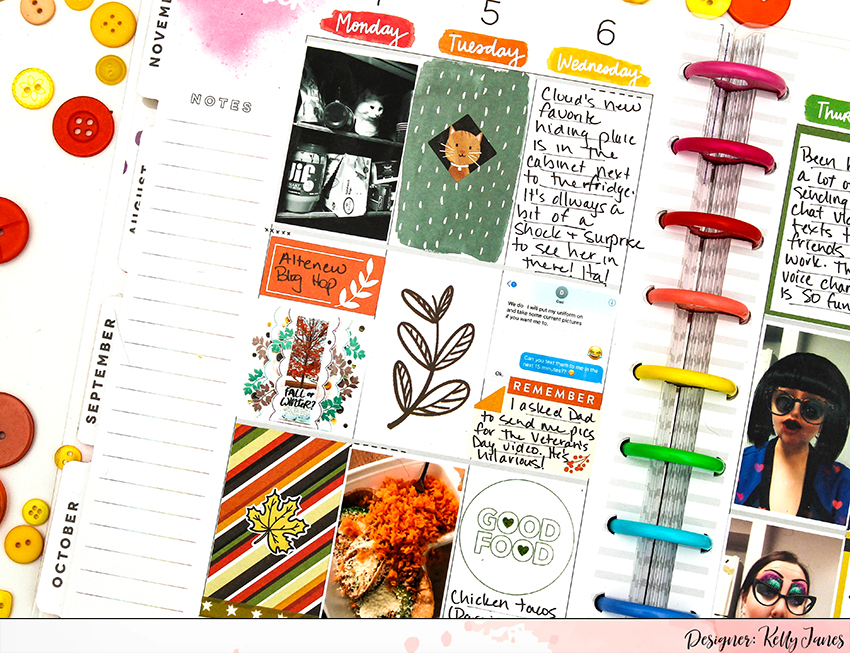
The Classic Happy Planner has recently become my favorite way to document my photos. I use the planner as a weekly Project Life style album and I know that type of memory keeping can be intimidating. Staying on top of what photos to use, editing the photos and printing the photos can be a handful. Today I’m going to share a step-by-step tutorial on how I organize, edit, resize, and print my photos.
EDIT, ORGANIZE, PRINT
STEP 1: Locate your photos. I only use photos on my phone, so I go into my photo gallery and search the month & year I want to print. [I batch print my photos by printing an entire month at one time]. I then go through that particular month of photos; deleting the photos that have no meaning [screenshots] or photos that are duplicates.

STEP 2: Edit your photos. The PicMonkey App is what I like to use. It’s a quick & simple process. Just a few short clicks and done!


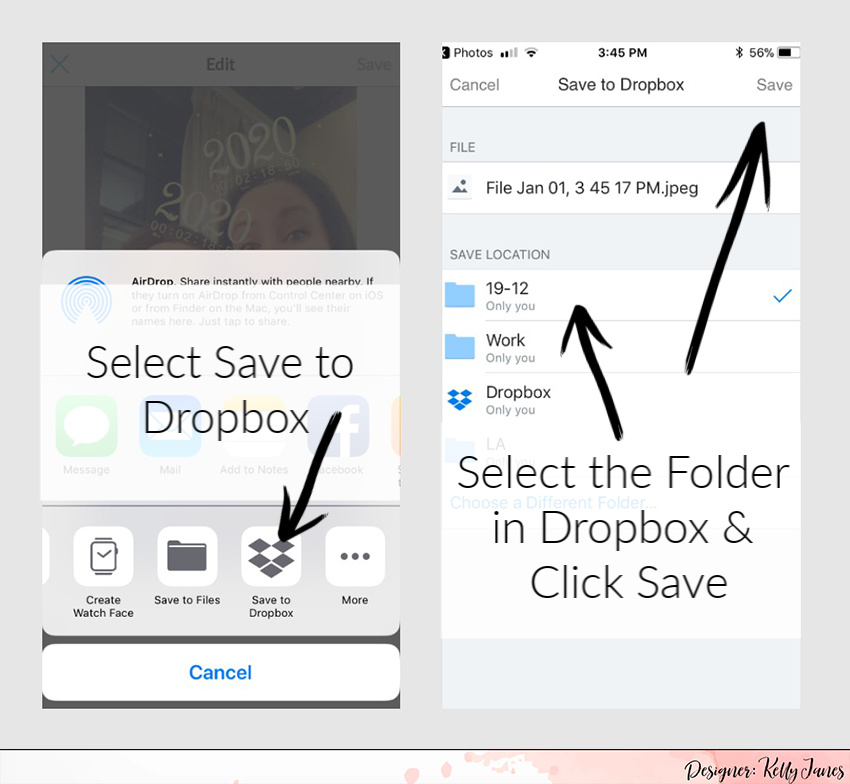
STEP 3: Move the photos to your computer. I have a PC so my photos from my iPhone do not automatically sync with my computer. To get the photos to my computer, I use the Dropbox app on my phone that automatically syncs with Dropbox on my computer. I create a folder for the month and save the photos to that folder. This way the photos stay organized and can be easily found on my PC. [I usually wait until the end of the month to edit all of my photos, but if that feels too time consuming to do it all at once then the photo editing and purging process could be done daily or weekly.]
STEP 4: Use a custom template in Photoshop to create clipping masks so your photos are sized appropriately for your planner. [See below for a step-by-step video & written tutorial on how to create this template that can be used repeatedly month after month.]
STEP 5: Print your photos.
PHOTOSHOP TEMPLATE
I use Photoshop CC so these steps may vary slightly depending on the version of Photoshop you use.
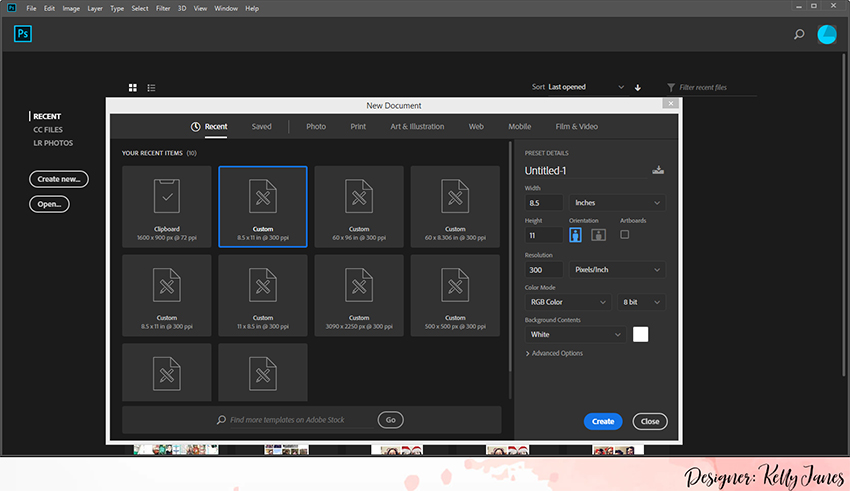
STEP 1: Open Photoshop.
STEP 2: Create a new 8.5 x 11″ document by going to File >>> New.

STEP 3: Create new layer.

STEP 4: Using the Rectangular Marquee Tool draw a rectangle that matches the size of your planner boxes. I use the Classic Happy Planner so my rectangle measures 1.5 x 2.4″.


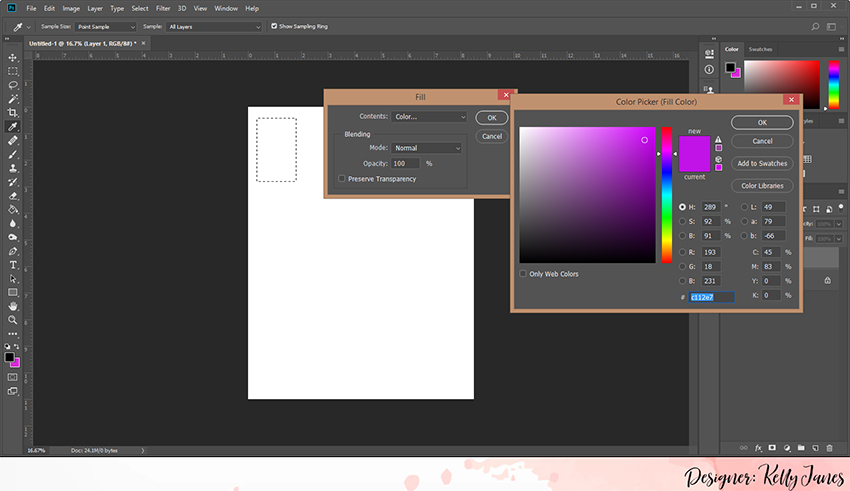
STEP 5: Go to Edit >>>Fill.

STEP 6: Select a color to fill the rectangle. I prefer to use a dark color because it’s easier to recognize the rectangle placement on the document within the layers panel.
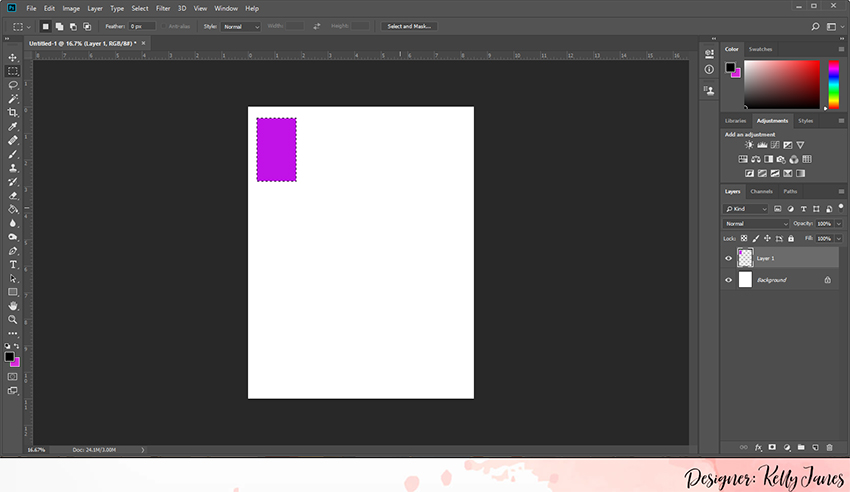
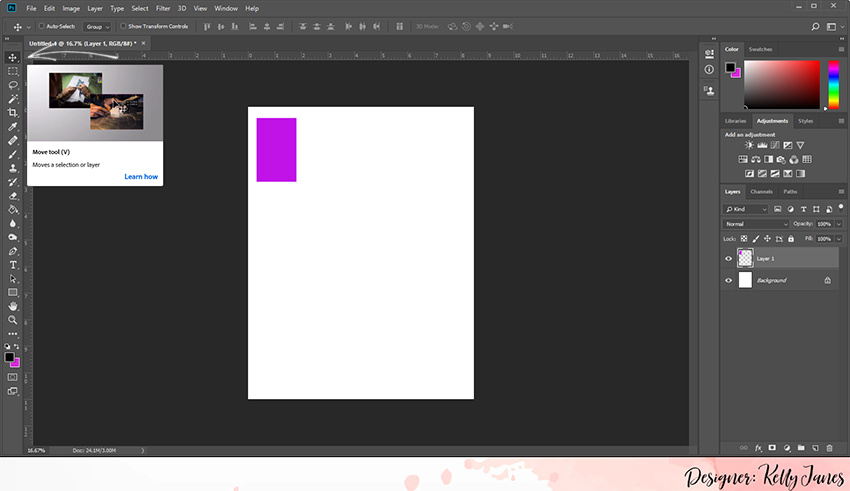
STEP 7: Go to Select & click Deselect. Use the Move Tool to drag the rectangle to the top left corner.
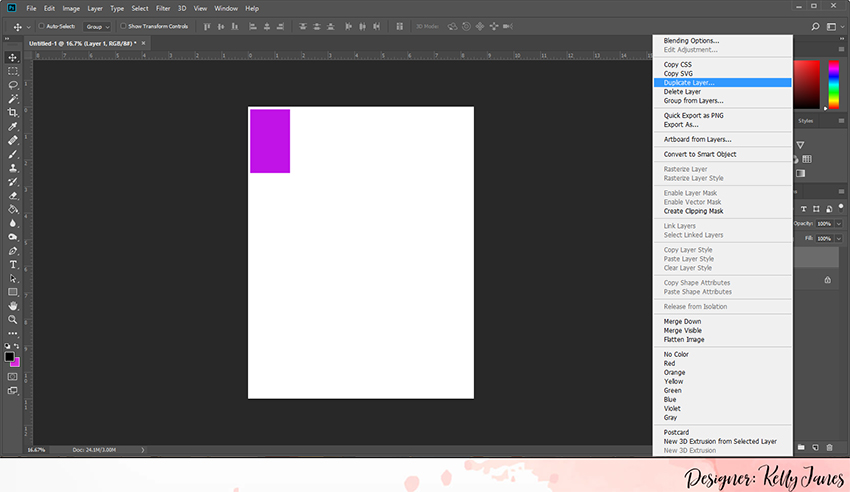
Then go to the Layers Panel and Right Click on Layer 1 >>> Duplicate Layer. Use the Move Tool to arrange all the rectangles. You should be able to fit 20 rectangles onto the 8.5 x 11″ document. [Tip: I like to name my layers 1-20. I find it easier to keep the layers organized.]
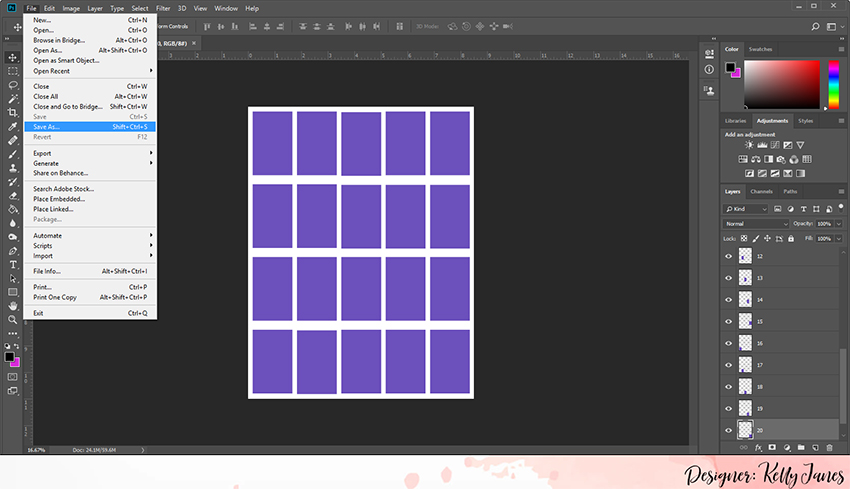
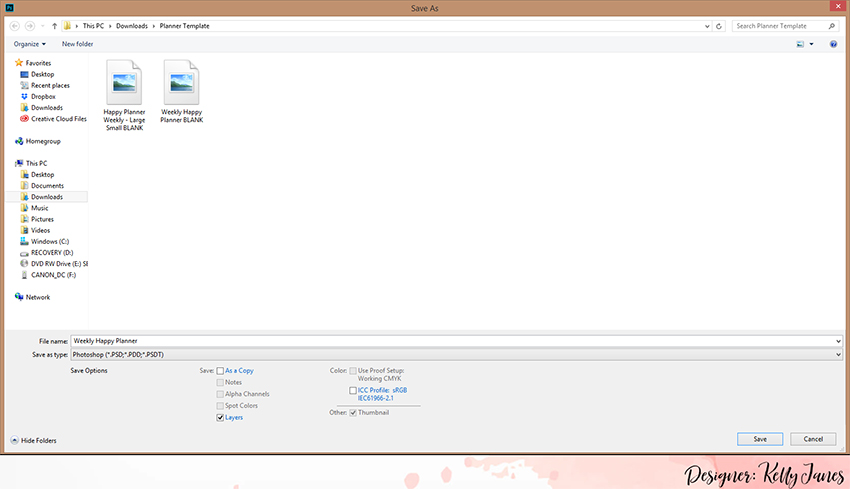
IMPORTANT NOTE: After you have the document filled with rectangles, you will want to save the document to your computer as a PSD File. This way you can just reopen the document each time you want to print photos for your Happy Planner. If you don’t save it as a PSD File then you will have to recreate steps 1-7 each month.
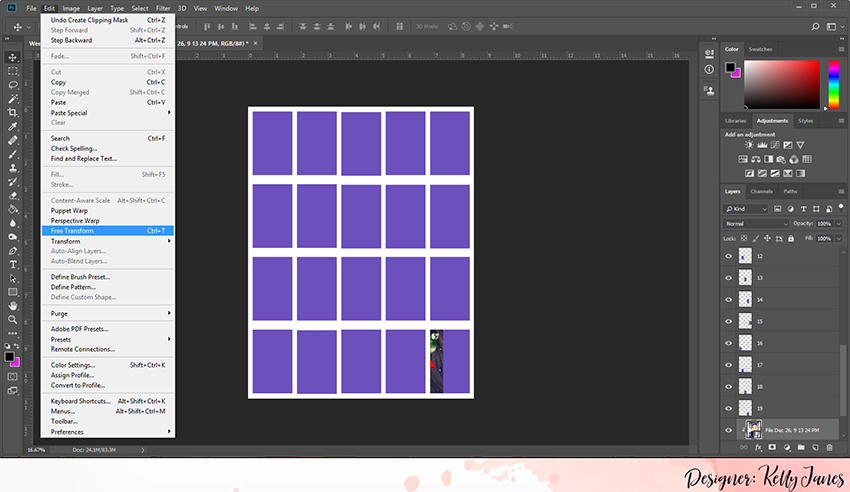
STEP 8: Go to File>>>Place Embedded.

Select your photo that you want to insert into the template.

STEP 9: Click Enter on your keyboard to deselect the photo. Then go to Layer >>> Create Clipping Mask [Shortcut: Alt+Ctrl+G].

STEP 10: Resize your photo by clicking Edit >>> Free Transform [Shortcut: Ctrl+T] on your keyboard.

STEP 11: Click on the next layer in the Layers Panel and repeat steps 8 through 10 until all of the rectangles are filled with photos. After you have all of your photos placed, save the document to your computer as a JPEG. Open the JPEG and send to your printer.
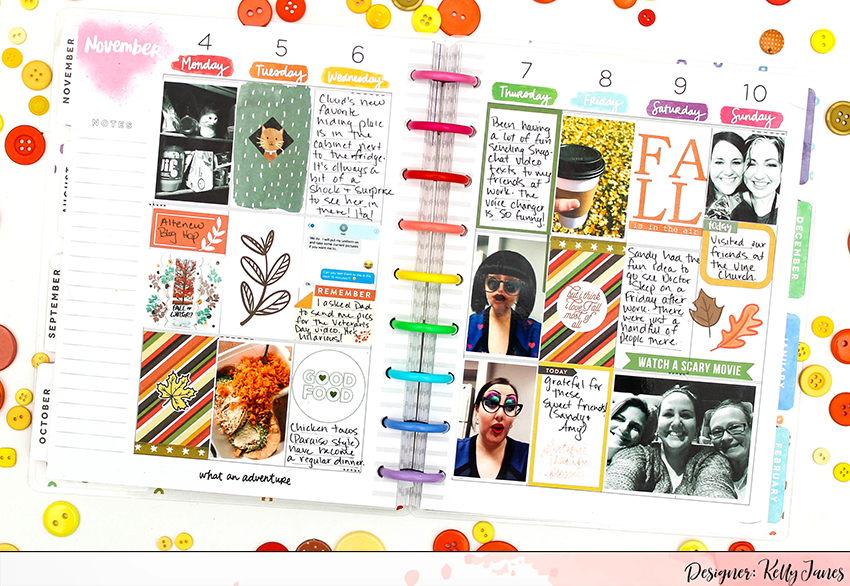
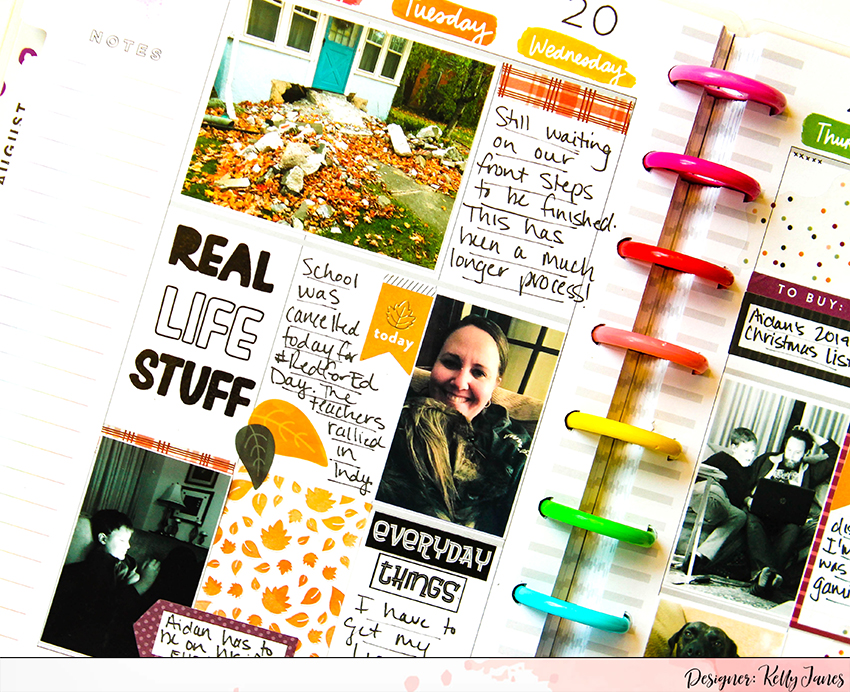
Here’s an example of what a template looks like when it is filled with photos.

Now you can take a look at a video that shows this same process in motion.
I hope you’ve found this tutorial helpful! Do you use your Happy Planner as a Project Life style scrapbook? If you do, I’d LOVE to see your spreads! Tag me (@kelly.janes) on Instagram!
![]()
 ‘
‘