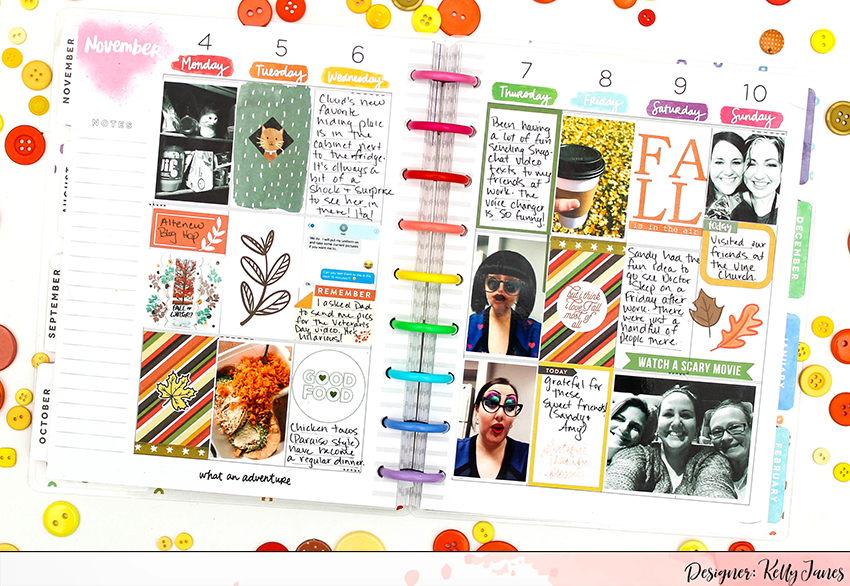
If you watched my recent Scrap Chat Video then you’ve heard the news that I’m planning on switching up my scrapbook style in 2020. I’m making a transition to documenting my memories in a Classic Happy Planner. This planner will be used as a way to get the everyday snapshots off my phone and into an album. I really do think that those small moments make up what my life is all about and enough of those moments don’t make it onto a 12×12 scrapbook layout.
I recently recorded another Scrap Chat video [see below] on tips to get started and I explained how I stay up-to-date on my Happy Planner documenting, but thought it may be easier to reference that info in text form.
TIPS TO GET STARTED
I have a few tips on how to get started with Happy Memory Planning.
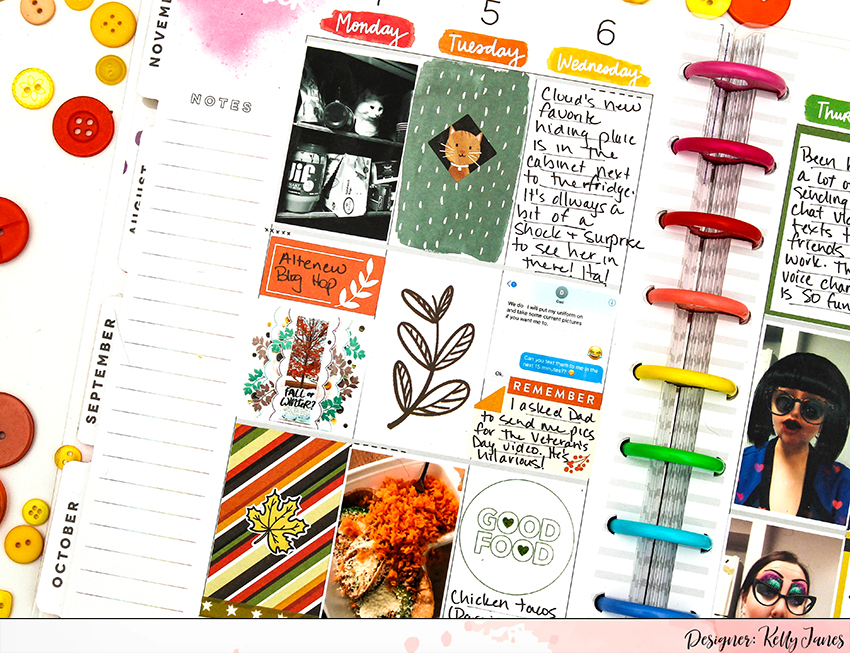
TIP #1: Decide which Happy Planner is best for you. There are 2 sizes of Happy Planners that I think would work well for photo documenting/memory keeping. The first is the Big Happy Planner. Each box is designed to fit a 3×4″ photo which is a fairly easy size to print. The second option is the Classic Happy Planner [which is what I use]. The Classic Happy Planner measures roughly 8×10 and the boxes are sized 1.5×2.4″ …this size is a bit trickier to print, but definitely doable!
TIP #2: Decide how you will print your photos. [This tip really ties into Tip #1 and will help make the decision on what type of Happy Planner will be best for you.] I use Photoshop to resize my photos and print from home. If Photoshop isn’t really your thing, then the BIG Happy Planner may be better. A 2×3″ photo is a fairly common size to print and may be more easily accessible for you. ACCESSIBILITY IS IMPORTANT. You want to make this process as easy as possible. If you’re finding it difficult to resize and print your photos then it will be easy to fall behind quickly. [I will be recording a step-by-step tutorial on how I get my photos edited from my phone, sent to my computer, and then resized in Photoshop in the next couple weeks].
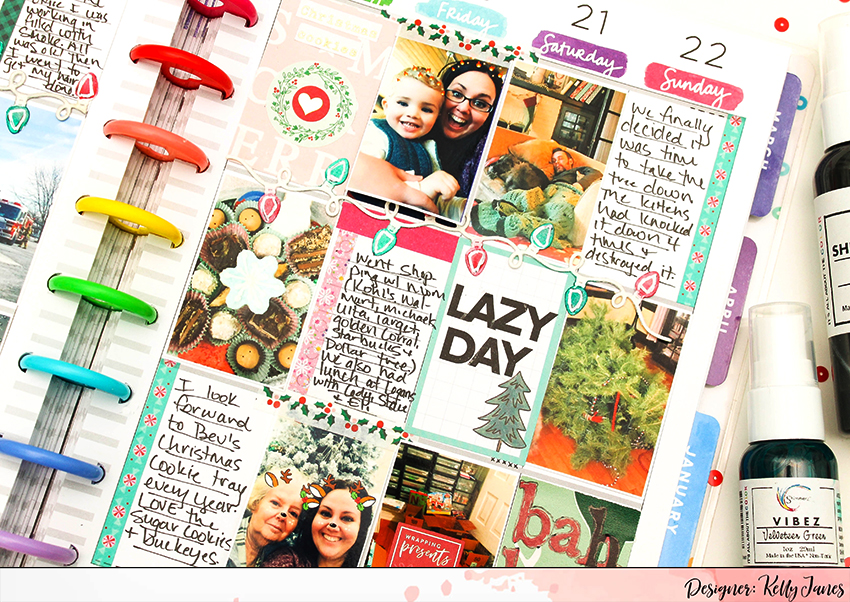
TIP #3: Don’t overbuy! It’s so easy to get caught up in buying all the things! A lot of the planner girls use multiple planners for various things. I would recommend just starting with one planner and a few sticker books. The sticker books I would recommend are Colorful Boxes (there is a great mix journaling spots and quotes), a Seasonal Book (to document holidays and the different seasons of the year) and then another sticker book that just seems fun or that will fit your style. There are multiple floral sticker books that just make my heart happy! So, just find one that you think you would enjoy using on your spreads.
There are other accessories [weekly punches, paper punches], but I would wait to see if these punches will fit into your style of Memory Planning before purchasing. I’ve been Happy Memory Planning for almost 6 months and I’ve only used these punches on two spreads. Stamps and washi are great, but, again, I would wait until you find your style before investing too much into these accessories. You will need to have basic supplies [paper trimmer, scissors, pens, adhesive, etc.].
 ‘
‘
HOW I STAY ON TRACK
I use my Classic Happy Planner as a Project Life style album, and I know that Project Life can seem overwhelming to some; including me! I have a few a little insight to how I stay on track/up-to-date.
#1: Keep your photos in one place. I ONLY use photos from my phone. I think it would be difficult to try to keep track of my photos if I was using photos from my phone, my point and shoot camera and my DSLR. It would be doable to use multiple devices, but, for me, this project is all about making it as simple as possible.
#2: Batch Printing. I edit and print my photos for the month all at one time. I like to wait until the month has completed before I print my photos, because I like to have perspective on the stories I want to document. [Example: I waited until November 1, before printing my October photos.] Again, I will post a step-by-step tutorial on how I edit, organize, transfer my photos from my phone to my computer and how I created/use the template in Photoshop.
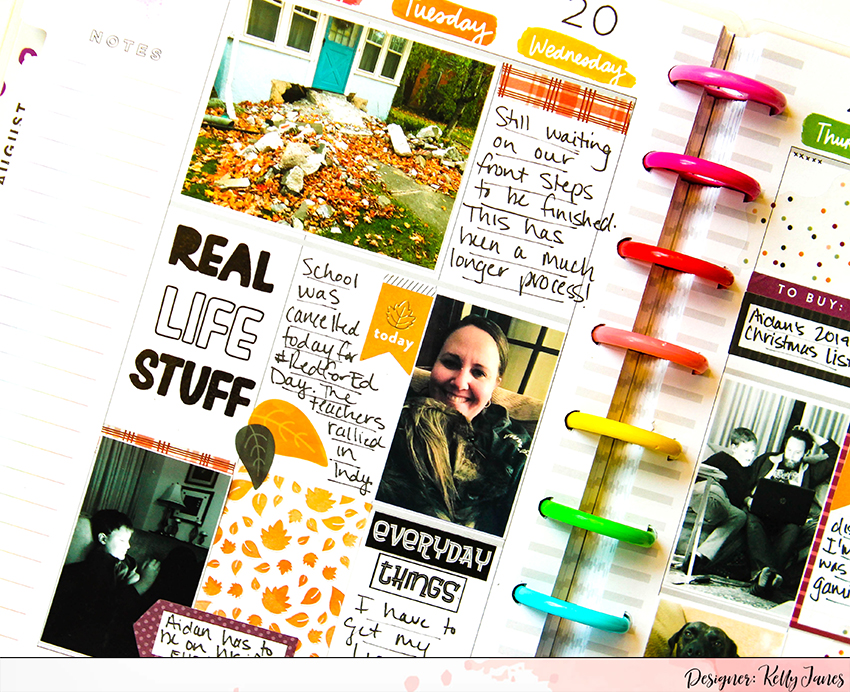
#3: Keep a daily/weekly journal. I jot down stories and quotes to help jog my memory on what I want to document. Doing this is a huge help since I’m printing my photos a month after they were taken. The entries are not in-depth. I keep the journal next to my bed and write a couple lines of journaling every day or so. It’s usually what stands out to me on what happened during the day. I then reference this journal as I’m Happy Memory Planning. Another great way to keep track of your stories is to use sticky notes to jot down memories/quotes and stick them directly in your Happy Planner.
#4 Stay Organized. Keep your planner supplies in one place & keep them easily accessible. I have a cart from Michaels that I use to house all of my products. It holds my Happy Planner, has room for my journal, my paper trimmer, ruler, pens, sticker books and other accessories. I can easily pull the cart to my desk or I can pull the cart out into my living room and Happy Memory Plan with my family in the same room! <<<LOVE THAT!
PROS & CONS
CONS:
- One of the things I love about scrapbooking is to add dimension to my projects. Because The Happy Planner is a disc bound system, there’s not a lot of room for dimensional elements; such as chipboard or puffy stickers. Currently I have a little less than 6 months completed and I haven’t used any dimensional elements…I already need to purchase the expander discs.
PROS:
- The size of the planner. The Classic Happy Planner measures roughly 8 x 10″ [this includes the cover & spine]. 12 x 12 scrapbooks can be heavy and difficult to flip through because they are so large! This planner is easy to grab off the shelf, and you can hold it comfortably in your lap.
- I can fit an entire year of scrapbooking in one planner. Should we even talk about the amount of scrapbook albums I have?! YIKES!
- I am documenting in a more authentic way. I’m documenting stories and photos from the everyday moments that make-up the story of my life. I honestly think this little planner will be more valuable to my family/future generations than all of the scrapbook layouts I’ve made put together. It really does capture our lives!
- The disc bound system is easy to use. Being able to remove the pages from the planner and not have to worry about the spine/binding getting in my way when I write my journaling is AMAZING!
- I love that this system is so much more portable when comparing it to traditional scrapbooking. I just grab my planner cart, roll it out into the living room and scrapbook with my family in the same room. Or I just take the entire cart with me to a crop; which means no packing! Easy, peasy!
Are you a Happy Memory Planner?! Do you have any tips or tricks?! Please share in the comments below!
![]()
