Okay…here’s the deal….this post contains blunt information about the Tooth Fairy so if there are any innocent eyes on the screen you may want to come back and view this post at a different time.
—————————————————————
My 5 year old son has two VERY loose teeth…the Tooth Fairy will be making a visit very soon. The Elf on the Shelf was such a huge hit last year and I know the Tooth Fairy will be as well.
We recently watched The Rise of the Guardians movie and Aidan has a clear picture in his head what the Tooth Fairy is like…full of glitter, joy, and most importantly to a five year old gifts. When Teddy, the elf, arrived last year he came in a very big way, and I wanted to be sure the Tooth Fairy arrived in the same fashion.
So a glittery letter arrived with a package. It contained a burlap sack for my son to leave his teeth in, and in return he would receive a gift or money.
Close To My Heart has great products to use for scrapbooking and card making, but they also have products for projects such as this.

I grabbed the My Creations™ Burlap Drawstring Bags, and the Adventure Exclusive Inks® Mini Pigment Set. Using the Cricut® Art Philosophy Cartridge I cut a flower that led to a mask of a tooth shape. {Thanks to the idea from a fellow Damask Diva, Amie Kiger} I used the shape as a mask and sponge daubered the Honey Pigment Ink to create the tooth on the burlap. I used the new Cricut® Artbooking Cartridge for the font and followed the same technique in Lagoon Pigment Ink.
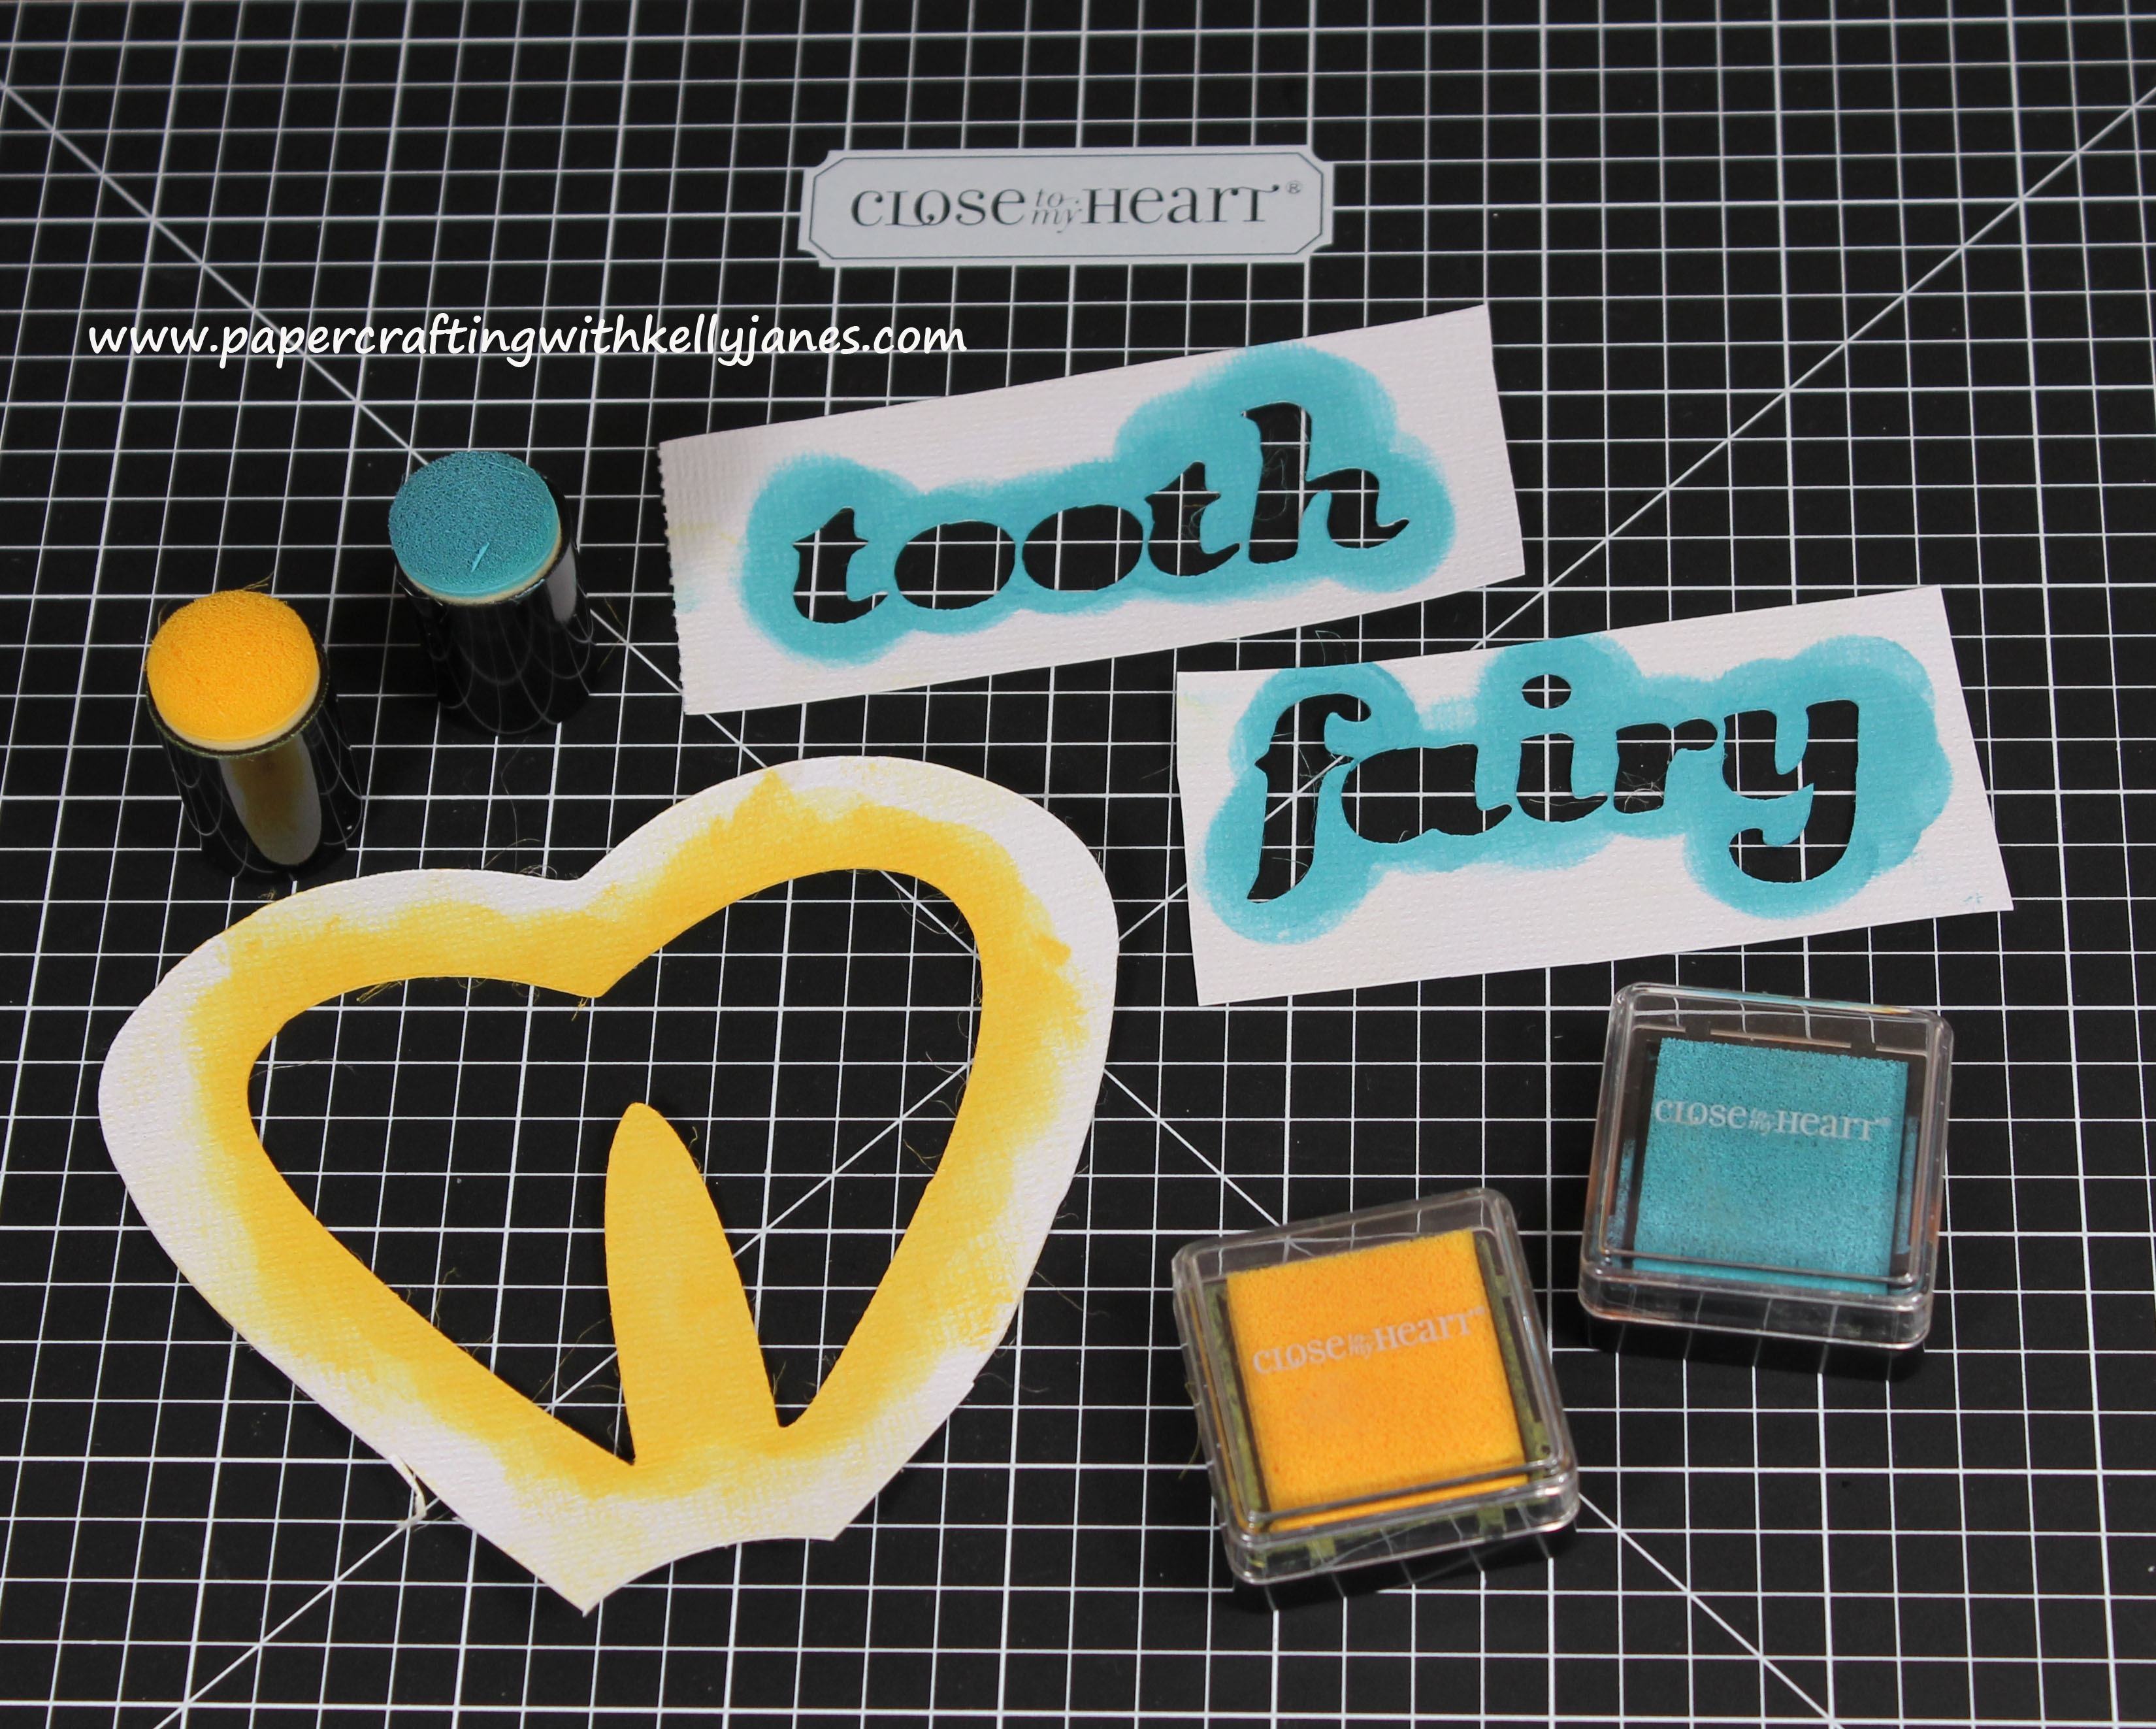
Because the Tooth Fairy is full of glitter I had to add a little shimmer to these bags!!!! Using the Stardust Glitz™ Glitter Gel I traced around the tooth to add a little extra bling to the bag.
Fortunately the burlap bags come as a set of three, so I made two identical bags to make the swapping of the tooth for the money and gifts just a little bit easier. Aidan only knows that one bag exists so I have to keep the second bag hidden very well!!!

While I am so exited to see his reaction when he loses his first tooth, it also makes my heart a little heavy. My sweet little baby boy is growing up so incredibly fast and there is no slowing it down. I wish I could freeze him at this age forever, but I know that just isn’t possible. So I’m going to continue to soak in every moment of his 5 year old craziness, and enjoy every minute!!!!
-Kelly
Update: Since I started writing this blog entry my son has lost both of his lower front teeth. As a full time working mom I was nervous of the possibility that I could potentially miss out on witnessing this first experience of his. But I was home when he lost both of his teeth, and I got to see that excitement all over his face!!! Even though it may not sound like a big deal to some…this was a tremendous blessing for me that I was a part of that very special moment in his life!


