Hi crafty friends! I’m back to share a new layout for Hip Kit Club using the January 2017 Kits.

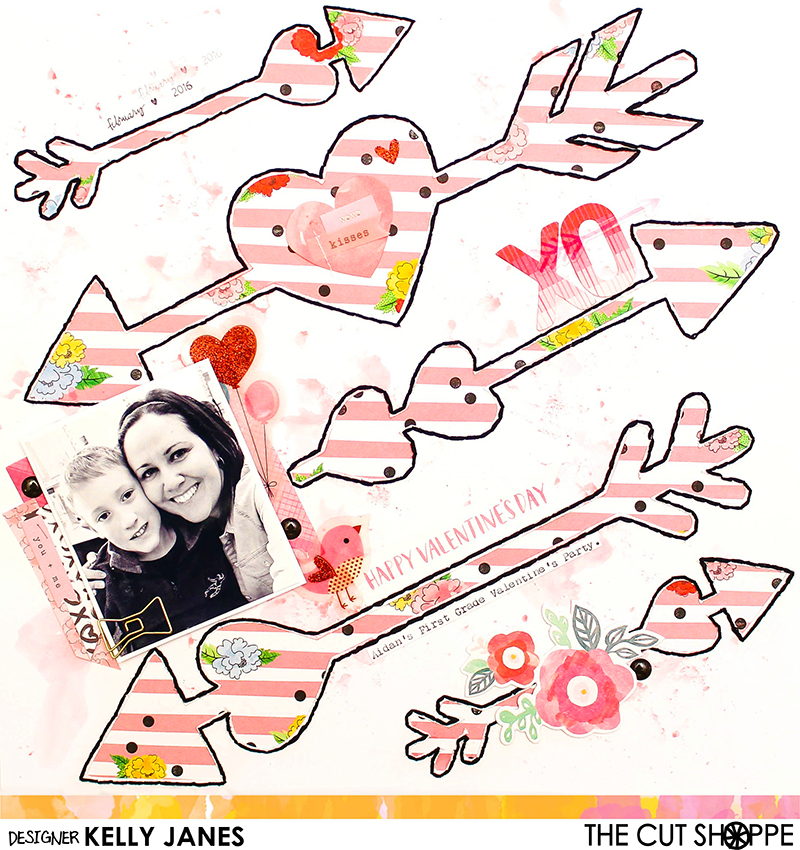
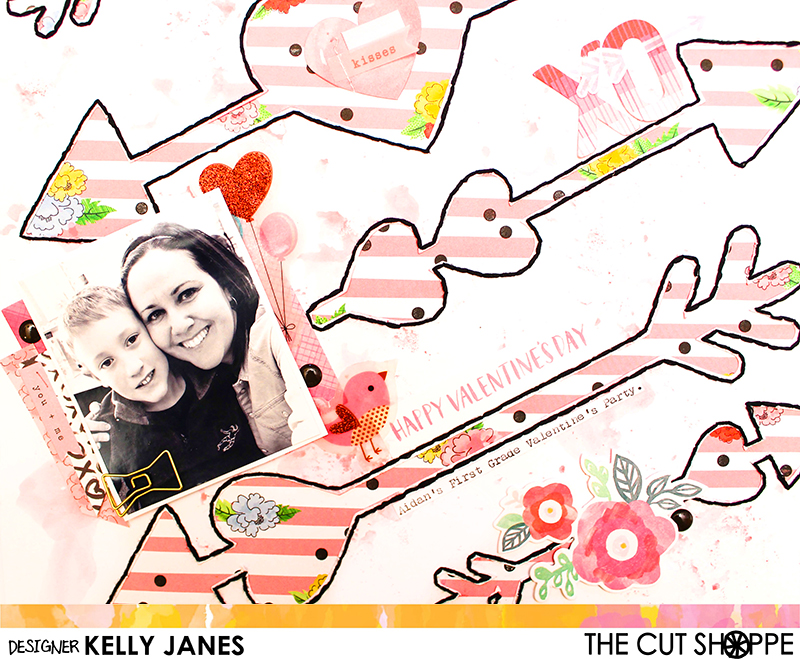
My layout today is based off sketch #12 in our Hip Kit Club Facebook Forum sketch series and this week’s sketch calls for a large photo. I don’t tend to scrapbook a lot of large photos and don’t have easy access to print large photos. I did scrapbook quite a few 5×7 photos when I first started scrapbooking and would have them printed on a fairly regular basis. So I headed to my stash and came across this photo from 2011. The sketch calls for a much larger photo but this 5×7 photo is much larger than what I typically scrapbook.
I started by layering multiple pattern papers from the Main Kit on a piece of American Crafts textured white cardstock from the Cardstock Kit. The Pink Paislee Moonstruck pattern paper and the two HKC exclusive pattern papers just compliment each other so well! I also added hand stitching using white embroidery floss onto each gray stripe to add extra texture.

I grabbed the the white canvas alphas from the Embellishment Kit and a few Prima Oil Pastels, from August 2016 Color Kit, to color the alphas a dark blue color. My title is also much longer than my typical titles and captures a majority of my journaling for this layout. Aidan was 3 years old when this photo was taken and he was obsessed with trains. My grandma lives near a set of tracks and we would take him there when we would visit her. He could sit there for HOURS just watching the trains go by.

To embellish the layout I grabbed a few of the cork shapes from the 1 Canoe 2-Hazelwood Collection, that are included in the Project Life Kit, and a few of the HKC exclusive wood veneer pieces included in the Main Kit. I placed the two cork clouds at the top of the page along with two of the wood veneer pieces.
I then started to create a cluster around the photo. I added the third cork piece and the third wood veneer piece in this cluster to create a visual triangle. I also added a heart & feather ephemera piece from the Pink Paislee-Moonstruck Collection. That entire ephemera pack is included in the January 2017 Main Kit! I placed one of the gold paperclips from the 1 Canoe 2-Hazelwood Collection, included in the Embellishment Kit, onto the heart ephemera. I also added a banner sticker from the Hazelwood Collection that is included in the Project Life Kit.

At this point I felt the layout looked a bit boring so I started to look for little odds and ends to add. I grabbed a scalloped border from the HKC exclusive die cut pack, that is included in the Embellishment Kit, and added it to the left side of the layout. I then added a couple of the HKC exclusive washi strips, also included in the Embellishment Kit, to the right side of the layout to help balance the navy color. I typed the remainder of my journaling, cut the paper into a thin strip, and added it along the right side of the layout. I then grabbed dark blue enamel dots from the Simple Stories-Posh Collection, that were included in the September 2016 Project Life Kit, and scattered them generously around the layout.

Now you can take a look at how this layout came together in my YouTube process video!
Thanks you so much for joining me today! Remember to stop by the Facebook Forum to see the weekly sketches!