I mentioned in my last blog post that The Cut Shoppe Design Team has closed. I thought it would be fun to reminisce and share my favorite top 5 favorite layouts that I have created over the last year! Each of these layouts has a YouTube Process Video. Just click on the photo to be taken to the original blog post where you will find the process video along with a detailed description of how these layouts were put together.
I so enjoyed my time on The Cut Shoppe Design Team and want to thank all of you for your comments, likes and love during my time on the team. I’m still going to be creating so stay tuned for more layouts and process videos!
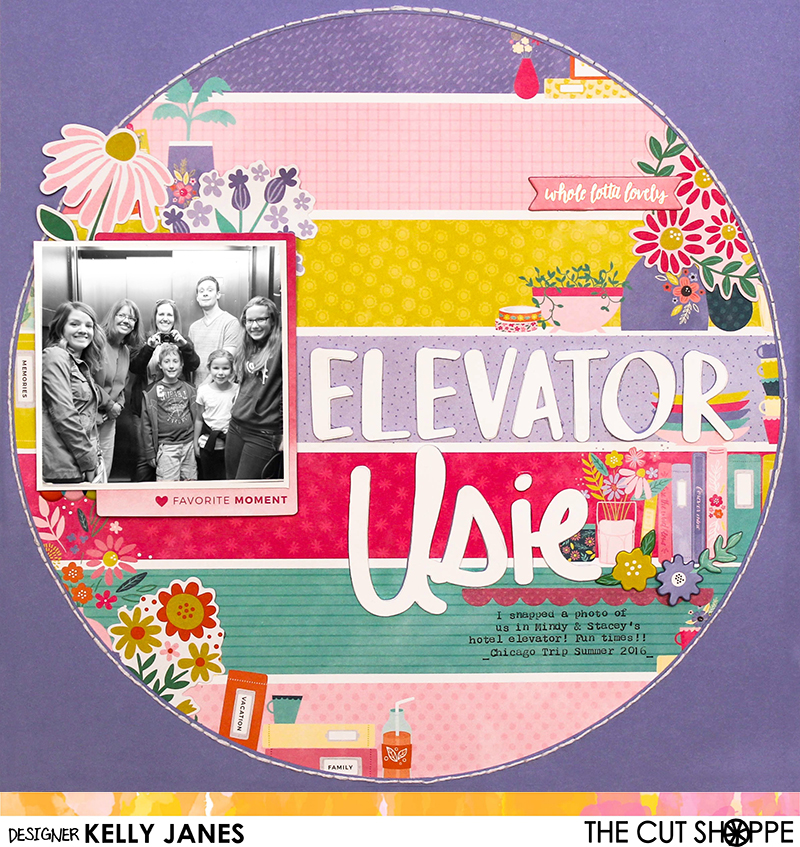
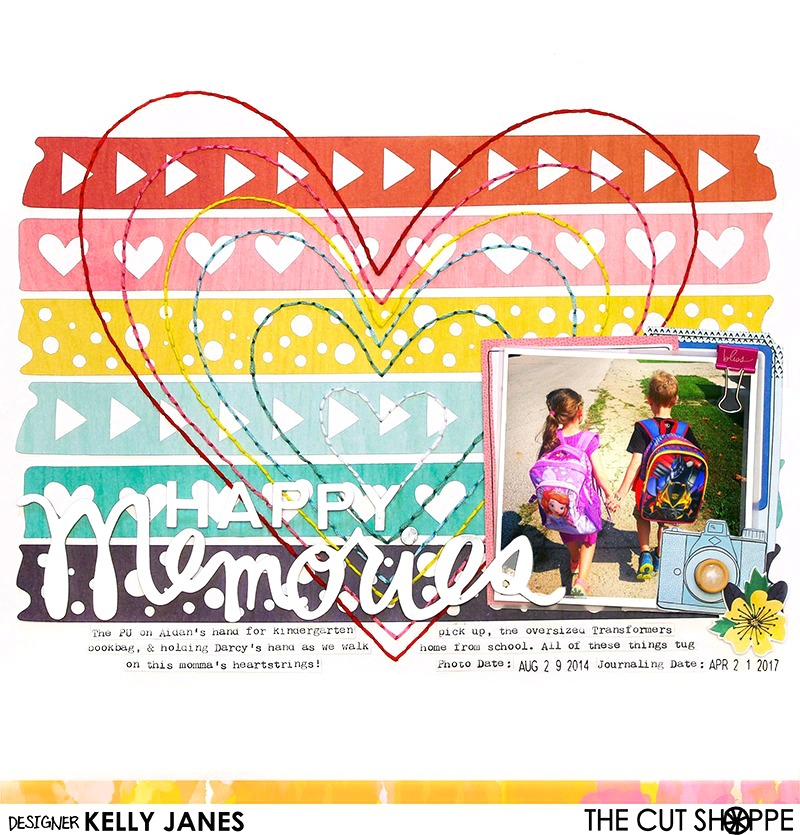
Hey friends! I’m back today with my final layout as a Cut Shoppe Design Team member.
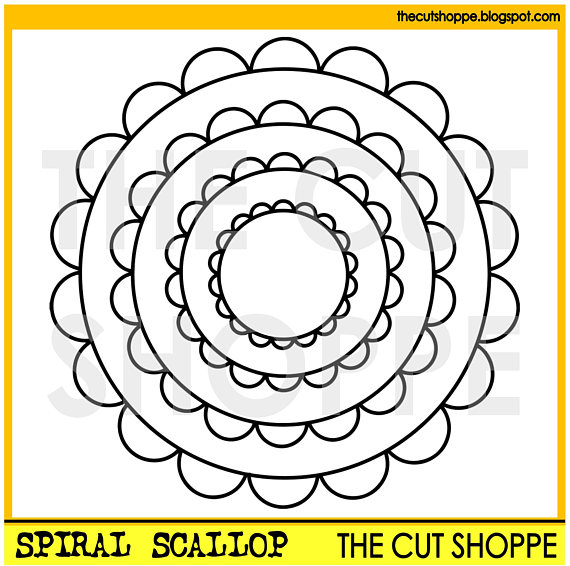
I started in Cricut Design Space by uploading the Spiral Scallop Cut File. I knew that I wanted to hand stitch this design so I converted the image from “cut” to “write” in Design Space. I used the “contour” feature to delete the half moon shapes in the center of the scallops. I then duplicated the image and using the “contour” feature I removed the circles from one image and the scallops from the other. Next I sized the images so the scallops were touching the circles and “attached” the image. By making these changes it will allow for more room to place my title on my layout! I then used my .03 Black Cricut Pen to draw the image on a sheet of pink patterned paper from the Maggie Holmes Bloom Collection.
After the image was drawn on the Maggie Holmes patterned paper I used watered down white acrylic paint and a paint brush to add white splatters to the background. I then used pink embroidery floss in various shades for the hand stitching. I added the hand stitching in an ombre pattern by starting with the lightest color in the center.
After the hand stitching was complete, I trimmed my photo into a circle using my Creative Memories Circle Cutter! <<Who still has this?! I find that I use mine a lot even though I have circle dies! I think it has something to do with the transparent template that just makes it so easy to use! After the photo was ready I added multiple die cuts from the Pink Paislee – Paige Evans Oh My Heart Collection. I also added a few white acrylic hearts that I found in my stash and a suede bow from the Pink Paislee – Paige Evans Take Me Away Collection.
For the title I grabbed Thickers from the Pink Paislee – Paige Evans Oh My Heart Collection. This photo, which is my favorite photo of all time, was taken in 2010. It was our first trip to Disney World and we had just arrived at Magic Kingdom. I think Aidan’s two year old heart was ready to burst with excitement when he saw those larger than life Disney characters for the first time. I love everything about this photo…Aidan’s facial expression and the fact that he was able to experience this moment with my dad (Aidan’s best friend!)! I was careful how I trimmed my photo and where I placed my embellishments because I wanted to be sure you could also see the way Aidan is holding my dad’s hand. The details of this photo melt my heart!
Now you can take a look at my process video which includes a Cricut Design Space 3.0 Beta tutorial!
In case you missed it Ashley has decided to close TCS Design Team, but The Cut Shoppe Etsy Store will remain open so head over there to check out the cut files! There is a sale happening this weekend! Use the code HAPPY4TH from July 1-4 and receive 50% off your entire purchase!
I want to thank Ashley for having me this past year! It has been such a joy creating with her designs and I’m going to miss being a part of this team!