Hello 2017 | Blog Hops with Heart

Hey crafty friends! This month I’m participating in the Blog Hops with Heart-Sparkling New Year Blog Hop. You may have come from Shelly’s Blog, but you can make your way around the entire hop by clicking the link at the bottom of my post. For my layout today I took the theme very literal. Lots of glitter, shiny gold accents, and a New Years theme!

12x12 scrapbook layout using the Pink Paislee-Moonstruck Collection

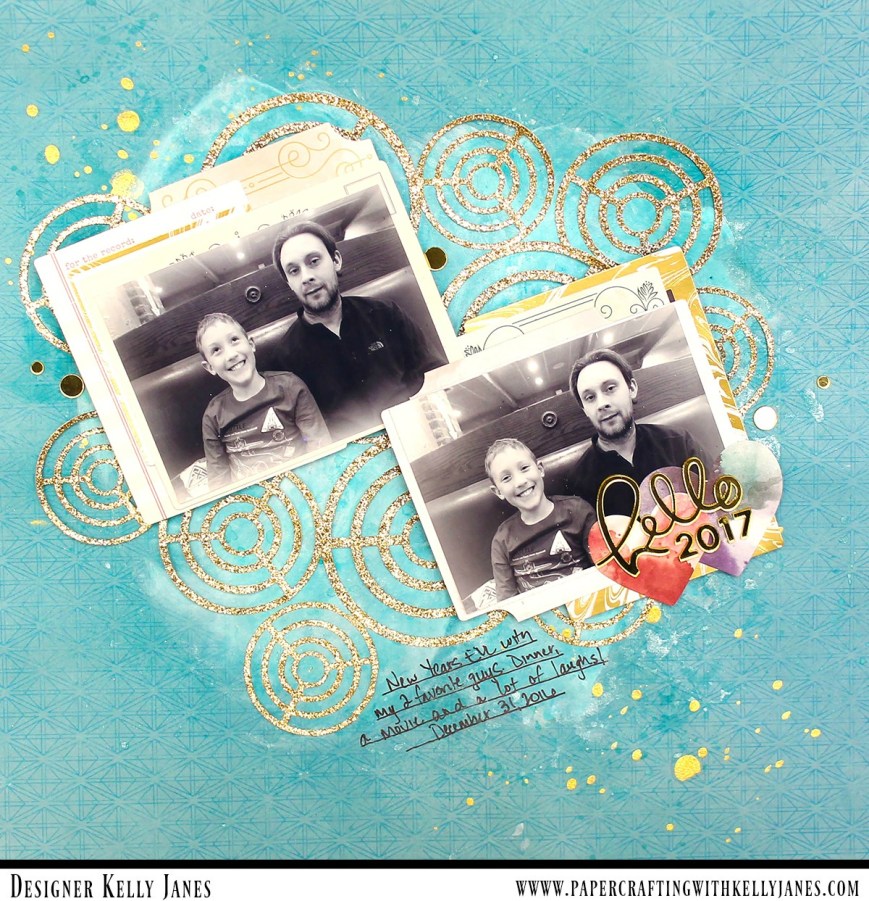
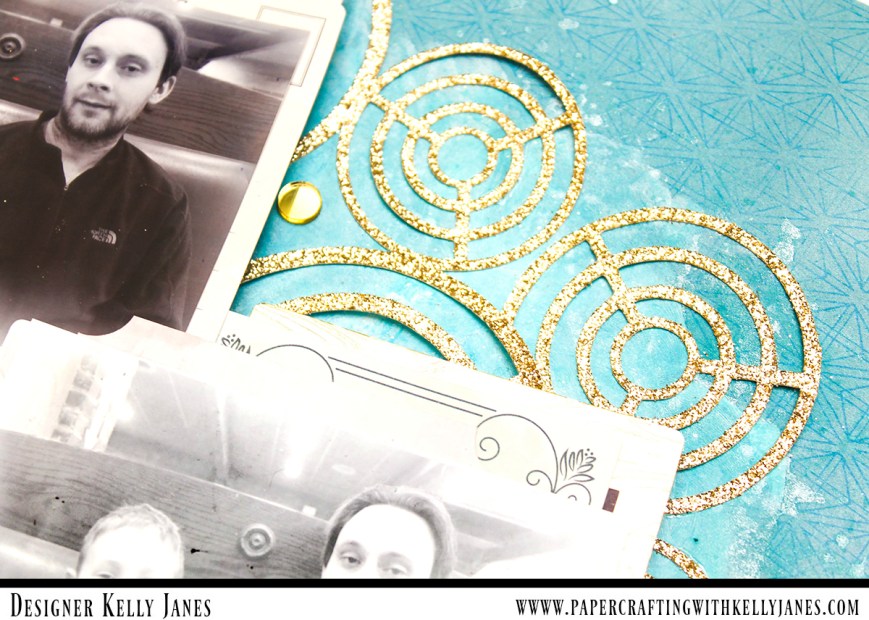
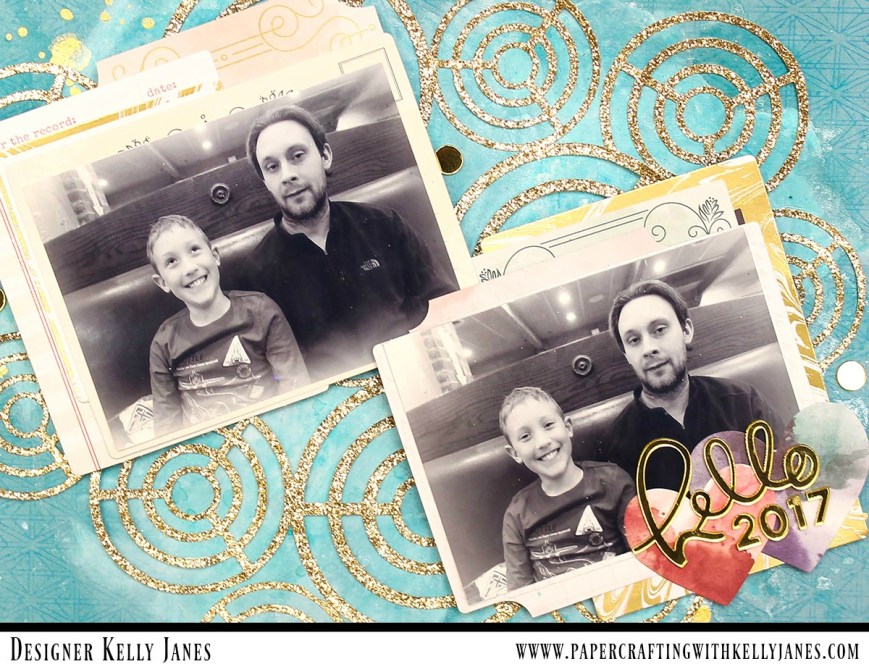
I used a blue pattern paper from the Pink Paislee-Moonstruck Collection as my background, and I added a layer of white gesso to prep the page for my mixed media. I used the packaging technique with two Shimmerz Mists, Jeni B Bleu Vibez and Well Blue Me Down Coloringz, to add a little interest to the background.

12x12 scrapbook layout using the Pink Paislee-Moonstruck Collection

12x12 scrapbook layout using the Pink Paislee-Moonstruck Collection

To add a little “sparkle” to my layout I used the FREE May Mash-Up Cut File from The Cut Shoppe on a sheet of gold glitter cardstock. I then grabbed my 2 photos and used multiple ephemera pieces from the Moonstruck Collection as layering pieces behind the photos. These photos were taken this year on New Year’s Eve. They are very similar, but Aidan always asks if we can take a ‘silly’ photo after I’ve taken the first official smiling photo. I love his funny personality and the photo just captures who he is at this age.

12x12 scrapbook layout using the Pink Paislee-Moonstruck Collection

12x12 scrapbook layout using the Pink Paislee-Moonstruck Collection

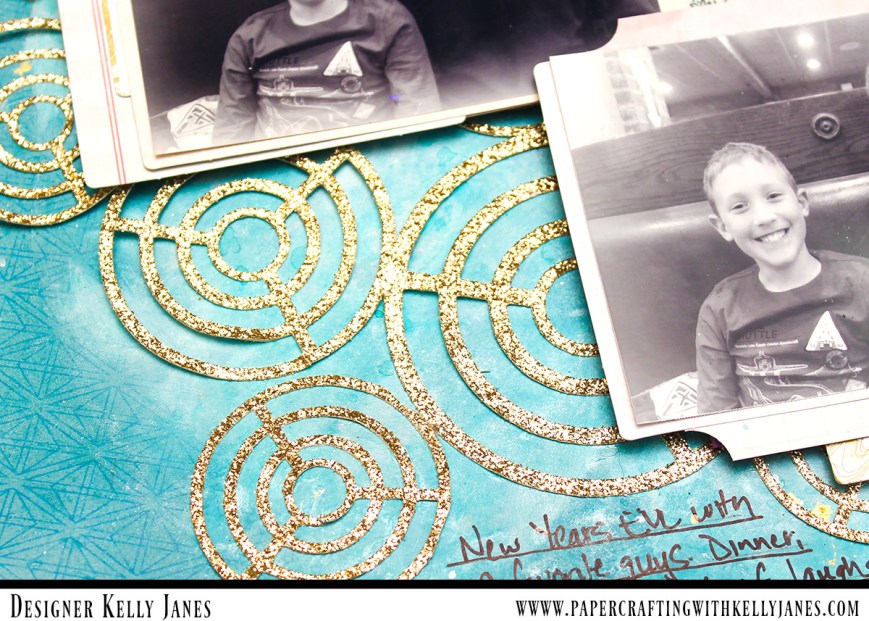
I used gold mirrored acrylic stickers for my title from the My Mind’s Eye-Yes Please Collection. For added detail and final touches I added gold splatters using Heidi Swapp Gold Color Shine and a few gold acrylic circles from the same MME sticker sheet.

12x12 scrapbook layout using the Pink Paislee-Moonstruck Collection

I also recorded a YouTube video that shows the process of how this layout came together.

I was the last stop on the hop this month, but you can start over or view the entire list of participants by heading to Amie’s Blog. Thank you so much for joining us on the blog hop this month and I hope you’ve found a lot of inspiration along the way!

Blog Hops with Heart

-Kelly

‘Tis the Season | The Cut Shoppe

Hello friends!  I have a new layout to share with you that was recently on The Cut Shoppe Blog.

The Cut Shoppe | Tree Farm & 'Tis the Season | Kelly Janes

For my layout today I used two cut files from The Cut Shoppe Etsy Store. I used The Tree Farm Cut File and The ‘Tis the Season Cut File.

The Cut Shoppe | Tree Farm & 'Tis the Season

In Cricut Design Space I used the contour feature to make one of the trees from The Tree Farm Cut File into a solid image. Then I took the ‘Tis the Season Cut File and sliced the ‘Tis the Season to Sparkle’ image through the tree. This will allow me to back the sentiment with pattern paper.

The Cut Shoppe | Tree Farm & 'Tis the Season | Kelly Janes

Before I backed the cut file with pattern paper I added color to the tree that is cut on white cardstock using multiple mixed media products including oil pastels, Shimmerz Jeni B Bleu Vibez, and Shimmerz Don’t Citron Me Coloringz.

The Cut Shoppe | Tree Farm & 'Tis the Season | Kelly Janes

The woodgrain background paper is from an older Hip Kit and all of the other pattern papers are from the Pretty Little Studio ‘Tinsel Town Collection’ designed by Ashley Horton. I also used multiple embellishments from that same line including the houses, the frame and the adorable Santa! I wanted to add a little more interest to the background so I used white acrylic paint to add a wash to the background.

The Cut Shoppe | Tree Farm & 'Tis the Season | Kelly Janes

After the paint was dry I adhered everything down to the background paper. I added stitching around the tree, by the photo cluster and also by the house on the bottom right. I also added a sprinkling of enamel dots from My Mind’s Eye in coordinating colors. I wanted to add black splatters but the background paper has a slick feel to it and I was concerned that Black Color Shine wouldn’t soak into the paper. So instead of using Color Shine I mixed black acrylic paint and added splatters using a paintbrush.

I’ve put together a process video that show how this layout came together. It also includes a Cricut Design Space tutorial showing you how I combined the cut files to create the tree on my layout.

MERRY31

Remember today is the final day to take advantage of the sale that is happening at The Cut Shoppe. Be sure to check out all of the amazing cut files and stock up! I hope you all had a very Merry Christmas and a Happy New Year! Thanks for joining me today!

Kelly Janes