XO Valentine | The Cut Shoppe

Hi crafty friends! I’m back with a new layout for The Cut Shoppe using the Cupid’s Arrows Cut File.

The Cut Shoppe | Cupid's Arrows | Shimelle-Little by Little, Crate Paper-Hello Love & Heart Day

The Cut Shoppe | Cupid's Arrows

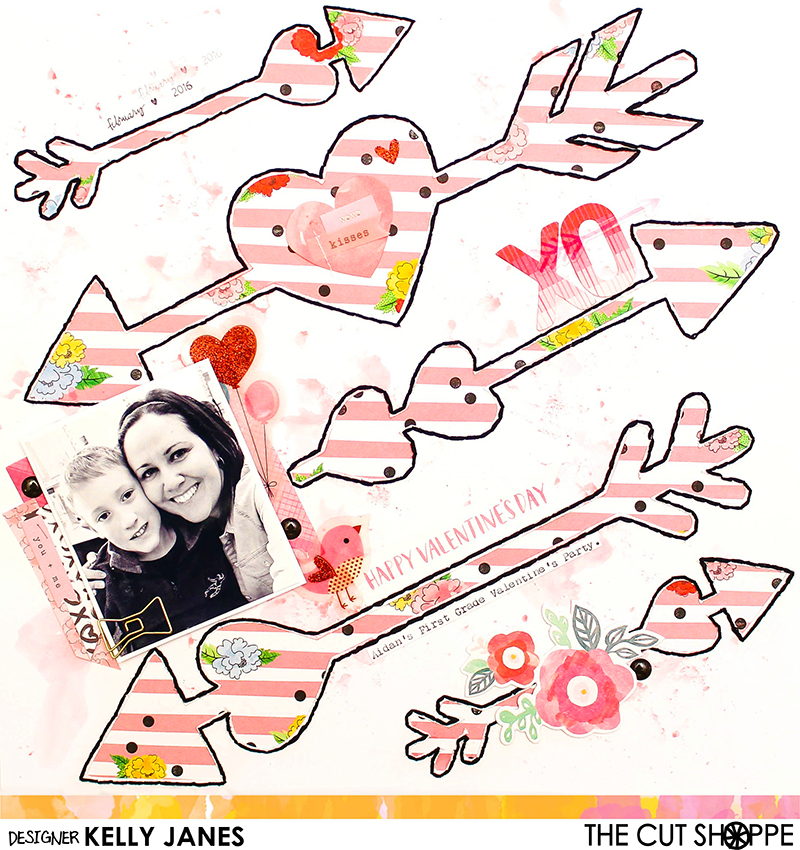
I started by “slicing” the cut file image apart in Cricut Design Space. I enlarged the arrows and rotated them slightly on the design screen for this fun tilted design! Once I had the arrows positioned I used the “attach” feature to hold the placement before sending the cut file image to the cutting mat.

The Cut Shoppe | Cupid's Arrows | Shimelle-Little by Little, Crate Paper-Hello Love & Heart Day

The Cut Shoppe | Cupid's Arrows | Shimelle-Little by Little, Crate Paper-Hello Love & Heart Day

I backed the arrows with a pattern paper from the Shimelle-Little By Little Collection and added hand stitching using black embroidery floss to create a defined edge along each arrow to help them pop off the page. I positioned my photo at the same angle as the arrows and added a lot of Valentine themed embellishments, including products from the Crate Paper Hello Love & Heart Day Collections and clear American Crafts stickers.

The Cut Shoppe | Cupid's Arrows | Shimelle-Little by Little, Crate Paper-Hello Love & Heart Day

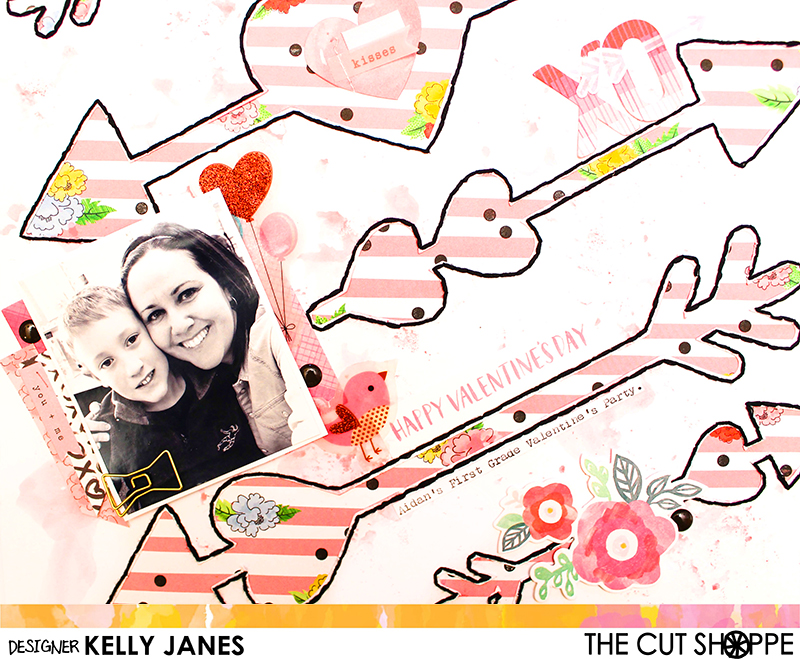
This layout was so much fun to put together and I love how the back stitching adds so much emphasis to the arrows!

The Cut Shoppe | Cupid's Arrows | Shimelle-Little by Little, Crate Paper-Hello Love & Heart Day

I’ve put together a YouTube process video that also includes a Cricut Design Space tutorial!

Thanks so much for joining me today and remember to head to The Cut Shoppe to check out all of the cut files and digital collections!

Kelly Janes

Date Night | Hip Kit Club

Hey crafty friends! I’m back with a new layout for Hip Kit Club using the January 2017 Hip Kits!

Hip Kit Club | January 2017 Kits | 1 Canoe 2- Hazelwood | HKC Exclusives

I started with an American Crafts white textured cardstock base from the Cardstock Kit. I then fussy cut and pieced together the large floral image from the 1 Canoe 2-Hazelwood Collection pattern paper that is included in the Main Kit & the Paper Add On Kit. Once I had the floral image positioned on the white cardstock, I added hand stitching around the perimeter of the flower using white embroidery floss. I also added hand stitching and a small cluster from the same pattern paper to the bottom left hand corner, directly under the photo.

Hip Kit Club | January 2017 Kits | 1 Canoe 2- Hazelwood | HKC Exclusives

Hip Kit Club | January 2017 Kits | 1 Canoe 2- Hazelwood | HKC Exclusives

My photo is from Instagram that I snapped of my husband and myself right before we left to go on a date, so I used the beautiful gold Thickers from the Main Kit to spell out the title, ‘Date Night’. Am I the only one that struggles with unique titles? HA! I added a strip of the HKC exclusive washi tape sticker sheet from the Embellishment Kit to ground the title. The designs on these washi strips are gorgeous, but they have a different feel than traditional washi. I tore the washi to give a distressed edge to help add a little extra texture.

Hip Kit Club | January 2017 Kits | 1 Canoe 2- Hazelwood | HKC Exclusives

I then added the camera paperclip from the 1 Canoe 2-Hazelwood Collection, included in the Embellishment Kit. I also added one of the HKC exclusive wood veneer hearts, from the Main Kit, next to the camera. I used my finger and Heidi Swapp Gold Texture Paste, from the January 2016 Color Kit, to add a gold shine to the wood veneer.

Hip Kit Club | January 2017 Kits | 1 Canoe 2- Hazelwood | HKC Exclusives

Next I added the beautiful butterfly rub-ons, from the 1 Canoe 2-Hazelwood Collection, that are included in the Main Kit. I placed the rub-ons on vellum and fussy cut each butterfly. This way I was able to move them around the page, similar to an ephemera piece, until I found the right placement. I then typed my journaling on white cardstock, cut it into strips, and added it directly under my title. I added gold splatters using Heidi Swapp Gold Color Shine and the layout is complete!

I put together a process video showing you how this layout came together!

This layout is based off sketch #12 in our Hip Kit Club Facebook Forum Sketch Series. Head over to the forum to check out the weekly sketches and the Design Team interpretations.

Thanks for joining me today!

kelly-janes-01