4×4 Chicago Mini

I think this is my final summer project that I want to share before moving onto my Fall and Halloween themed layouts, and this project is a little different from my norm. 12×12 scrapbook layouts are my true love, but I’ve been adoring the mini albums I’ve been seeing and wanted to give one a try.

For a short time Close To My Heart was offering 4×4 mini albums and page protectors. I thought this was be the simplest way to start out my mini album adventure since I’m already using albums and page protectors for my 12×12 layouts. I think one day I will venture into the mini albums made entirely of paper, but for today we will stick with the safe and familiar world of my pages being tucked into an album! HA!

4x4 Mini Album

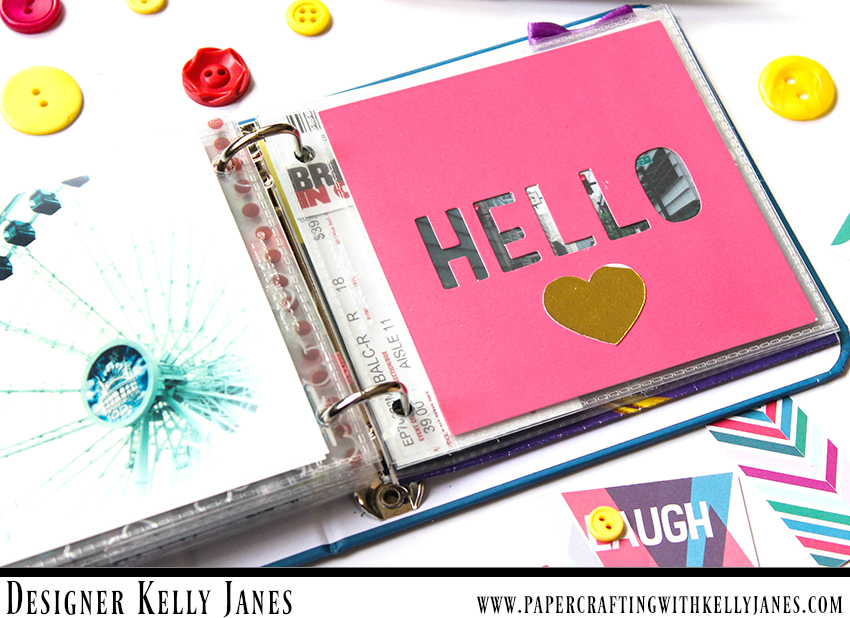
I used a the 4×4 denim colored chipboard album from CTMH and adhered the Shimelle Starshine Marquee Alphas to the outside cover. This album documents our trip to Chicago when we visited Navy Pier and went to see the Broadway production, Aladdin. I thought the marquee alphas were perfect because they remind me of the marquee signs you see outside of shows.

4x4 Mini Album

I was really inspired by Paige Evans for the intro page. Paige includes a lot of hand stitching in her albums, including stitching the country or place she visited.  I grabbed a scrap piece of acetate and used my Cricut Explore and .04 Black Cricut Pen to draw a miniature USA map on a piece of printer paper. I used washi tape to hold the printer paper to the acetate and used my paper piercer to create holes in the acetate for hand stitching. After the hand stitching was complete I used a puffy heart to signify where Chicago is on the map. The intro page overlays a picture of the city.

4x4 Mini Album

To add a little extra fun to the album I also included little see through elements. Where you could see photos from the future pages showing through openings. Like the photo from a future page is showing through the 2×2 heart insert or through shaker pockets and acetate pieces pictured below.

4x4 Mini Album

4x4 Mini Album

4x4 Mini Album

For a majority of the pages I used the retired mini album inserts from CTMH. The inserts consisted of full 4×4 designs and also 2×2 designs to fit into the 2×2 pockets. I also included memorabilia in the album, including the tickets to the Broadway show.

4x4 Mini Album

4x4 Mini Album

The thing that I love most about mini albums is the ability to work outside a page protector and to add tactile extras between the pages. I did include a few acetate pieces from the Heidi Swapp Serendipity Collection and also created a couple of my own inserts using acetate.

4x4 Mini Album

For the first insert I used White Modeling Paste and mixed blue acrylic paint to create a dusky shade of blue. After I had the color to my liking, I used the The Crafter’s Workshop Mini Urban Stencil to create the background of a city skyline. Once the blue paste was dry I went back over the skyline using the same stencil to add detailing with white modeling paste.

4x4 Mini Album

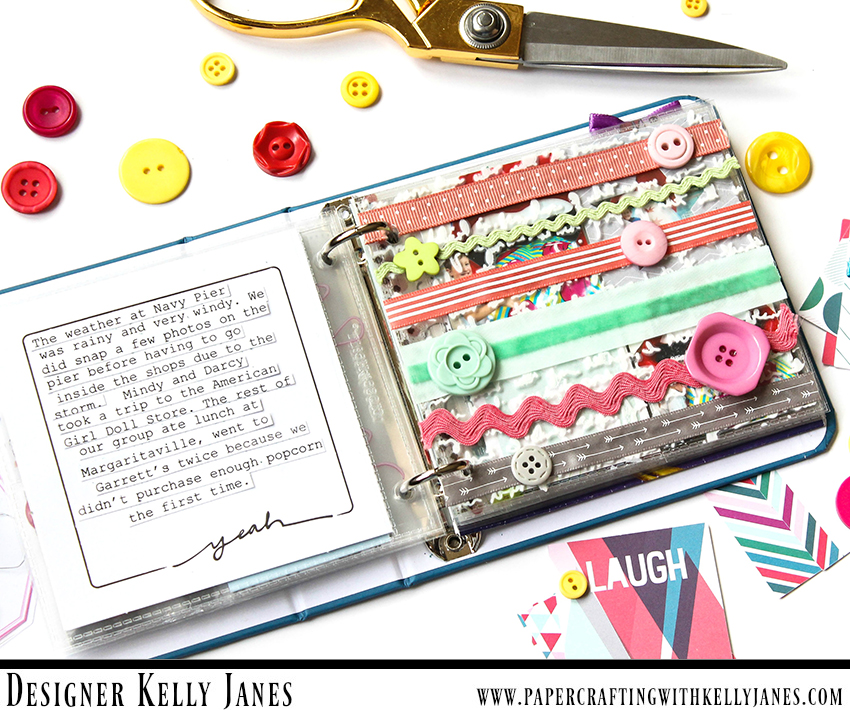
For the second acetate insert I used white modeling paste and The Crafter’s Workshop Mini Believe Script Stencil. After the modeling paste was dry I then adhered ribbon along with coordinating colored buttons.

4x4 Mini Album

I’ve included photos of a few of my favorite pages in this blog post, but you can view the entire mini album in my flip through video!

This post contains affiliate links, meaning I will receive a commission (at no cost to you) from items that are purchased from those links.

Happy Summer Fun

Hi everyone! I have a new summer layout to share with you today using a few different Pinkfresh Studio Collections.

12x12 scrapbook layout using multiple Pinkfresh Studio Collections including: Dream On, Life Noted, The Mix No.1, and Felicity

I started with the Wish Patterned Paper from the Pinkfresh Studio Dream On Collection as my background. I knew I wanted to add some layers behind my photo, but nothing was jumping out at me. As I was searching for something to use I came across 2 bits that have been on my desk for quite some time. The first is a yellow striped patterned paper from a retired CTMH collection and the second is a gold foiled Project Life Card from Pretty Little Studio. I love that the yellow matched the Dream On Collection perfectly and you can’t go wrong with gold foiling, right?! This is one instance where my messy desk worked in my favor! HA!

12x12 scrapbook layout using multiple Pinkfresh Studio Collections including: Dream On, Life Noted, The Mix No.1, and Felicity

After I had my layers chosen (I did also add white cardstock and vellum to the layers) I wanted to get a bit messy. The Crushed Coral Texturez from Shimmerz Paints matched the coral in the Dream On Collection perfectly! I used a palette knife and scraped the color along the cardstock in the area where my photo mat was going to be adhered.

12x12 scrapbook layout using multiple Pinkfresh Studio Collections including: Dream On, Life Noted, The Mix No.1, and Felicity

As the texture paste was drying I started grabbing embellishments. I grabbed a large die cut sentiment, Being with You is my Favorite, from the Pinkfresh Studio Dream On Die Cut Pack. Because I had a lot of white space to the right of the photo I directly adhered the sentiment to the photo. I also grabbed a couple die cut flowers and a rainbow die cut from the same die cut pack. I wanted to add a few additional pops of color to the right and left of the photo so I grabbed the Pinkfresh Studio Felicity Puffy Stickers and adhered a few asterisks in colors that matched the Dream On Collection. When I’m scrapbooking I tend to scrapbook by collection and/or manufacturer so I grab all of the embellishments I have from whatever manufacturer I’m using. I find that a lot of the time that the collections all blend well together.

12x12 scrapbook layout using multiple Pinkfresh Studio Collections including: Dream On, Life Noted, The Mix No.1, and Felicity

I didn’t want my photo positioned directly in the center of the layout, so I positioned the photo to the top left. I felt like I needed to add a cluster to the bottom right to balance the design because of the photo position. I grabbed an acetate word from the Pinkfresh Studio Life Noted Collection. I wanted the word to stand out from the background so I adhered the word to white cardstock and fussy cut around it. I then used the Black Puffy Alpha Stickers from the Pinkfresh Dream On Collection to finish my title. I grabbed a couple Leatherette Stickers and a Rubber Charm from the Pinkfresh Dream On Collection to complete the cluster.

12x12 scrapbook layout using multiple Pinkfresh Studio Collections including: Dream On, Life Noted, The Mix No.1, and Felicity

As I was looking at the layout I wanted to add a few final touches. I added the same Shimmerz Crushed Coral Texturez around the cluster, gold foam stars from the Pinkfresh Studio The Mix No. 1 Collection, and stitching to the sentiment on the photo and on the title to the bottom right.

Now you can take a look at my process video!

Thank you so much for spending part of your day with me!

This post contains affiliate links, which means I will receive a commission (at no cost to you) from items that are purchased from those links.