I’m back again with another card for Atlantic Hearts Sketch Challenge.
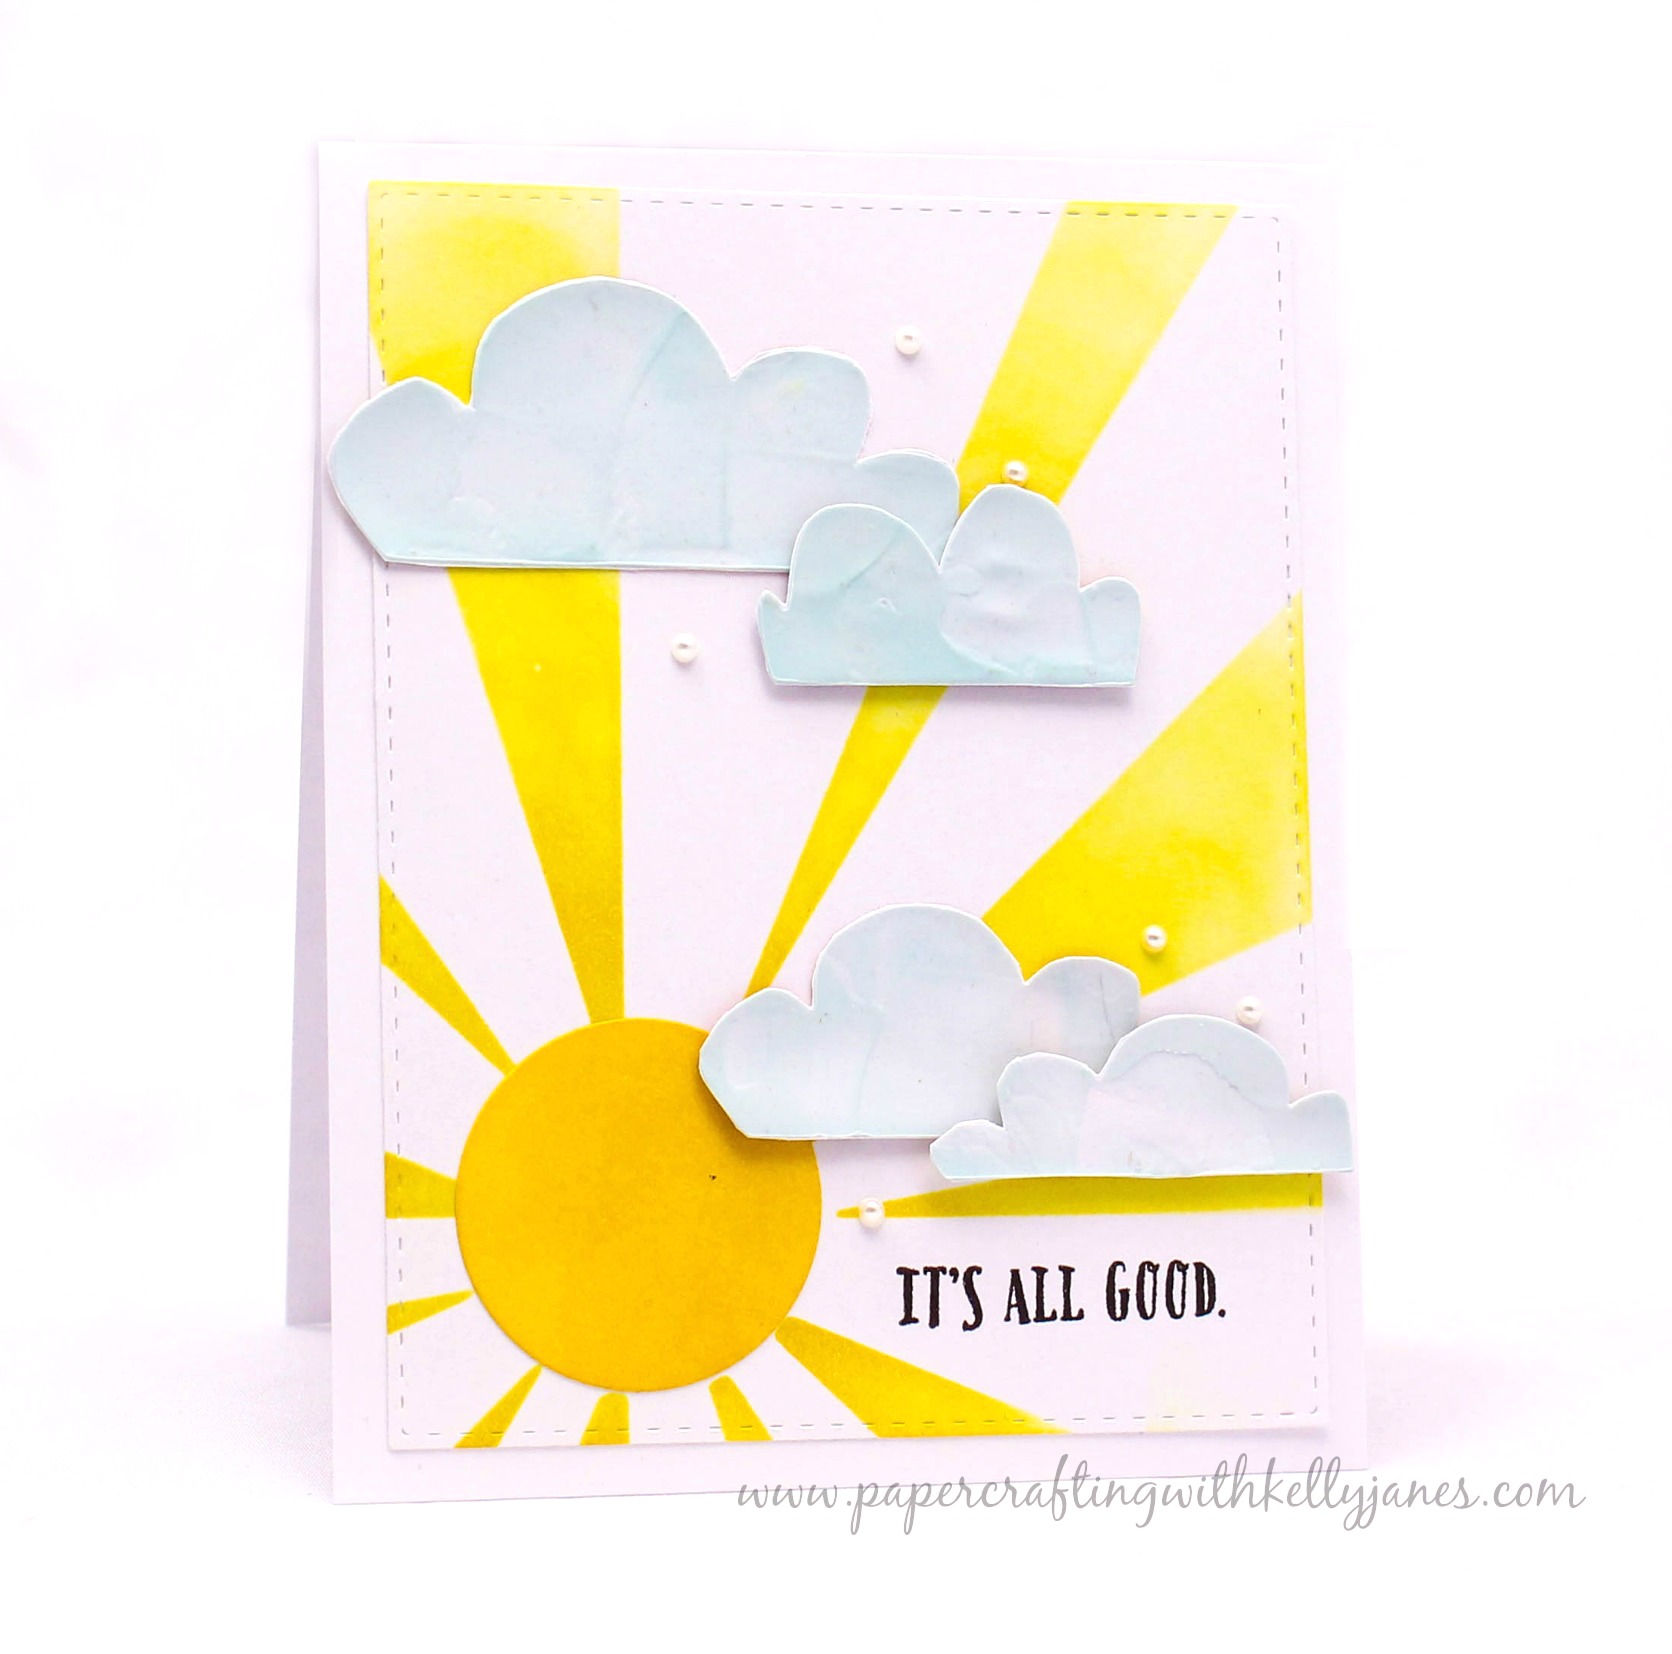
For my card I used a white cardstock base and then cut a white panel using a Simon Says Stamp Stitched Rectangular Die. I then used a Heidi Swapp sunray stencil and Mustard Seed Distress Ink to create a sunburst on the panel. Next I mixed white modeling paste with retired CTMH Sky Re-inker. I wanted to create a sky scene so I scraped the colored modeling paste along a cloud stencil from The Crafter’s Workshop on a scrap piece of cardstock. Once it was dry I fussy cut out the clouds and then scattered them around the panel. I used Thin 3D Foam Tape for a little added dimension. I absolutely LOVE the texture of the clouds! I used a sentiment from the CTMH Sunshine on a Cloudy Day Stamp Set in CTMH Black Ink and I finished the card by adding a scattering of mini pearls.
Now head to Atlantic Hearts to enter your papercrafting interpretation of sketch #168.
Welcome to The Blog Hops with Heart Embossing Blog Hop! If you’ve come from Amie Kiger’s blog then you are moving in the right direction, but it’s perfect if you’ve started here because our hop is a circle! Just click on the link at the bottom of my post to take you to the next blog and you’ll eventually make your way around the entire hop. My embossing is super subtle on my project! I had a big idea in mind, but it didn’t quite turn out the way I wanted. I wanted to use this particular photo because I knew I would need to use it in a larger format. I was afraid if I shrunk it down to a smaller size that it would be difficult to see because it is slightly dark even after editing the photo.
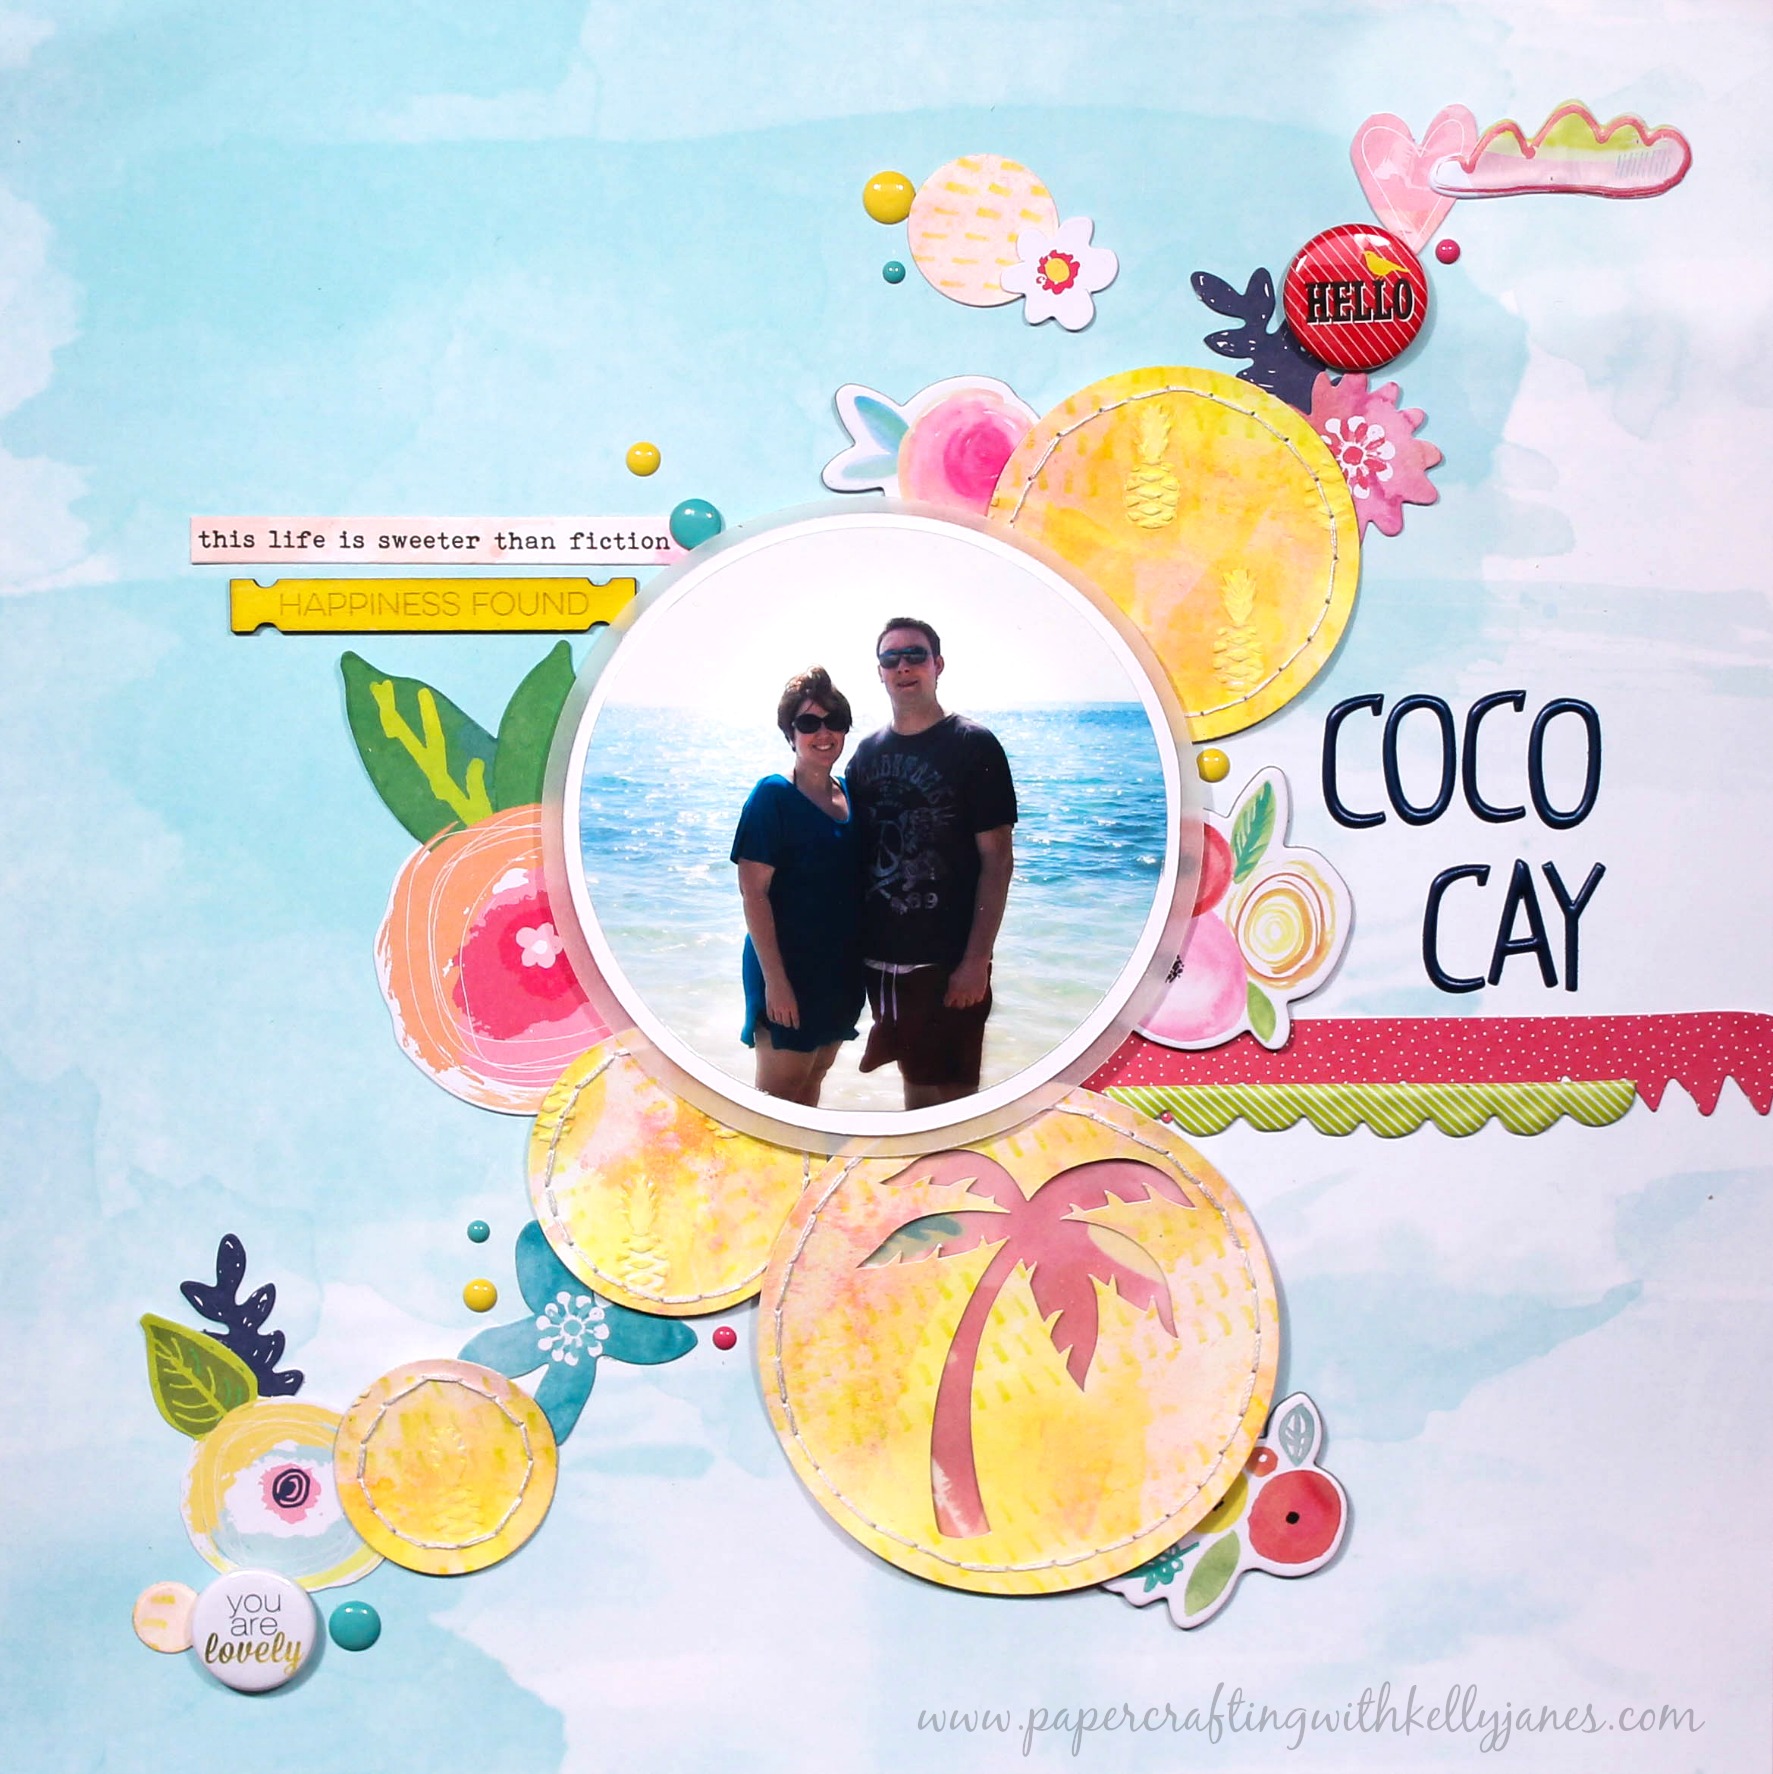
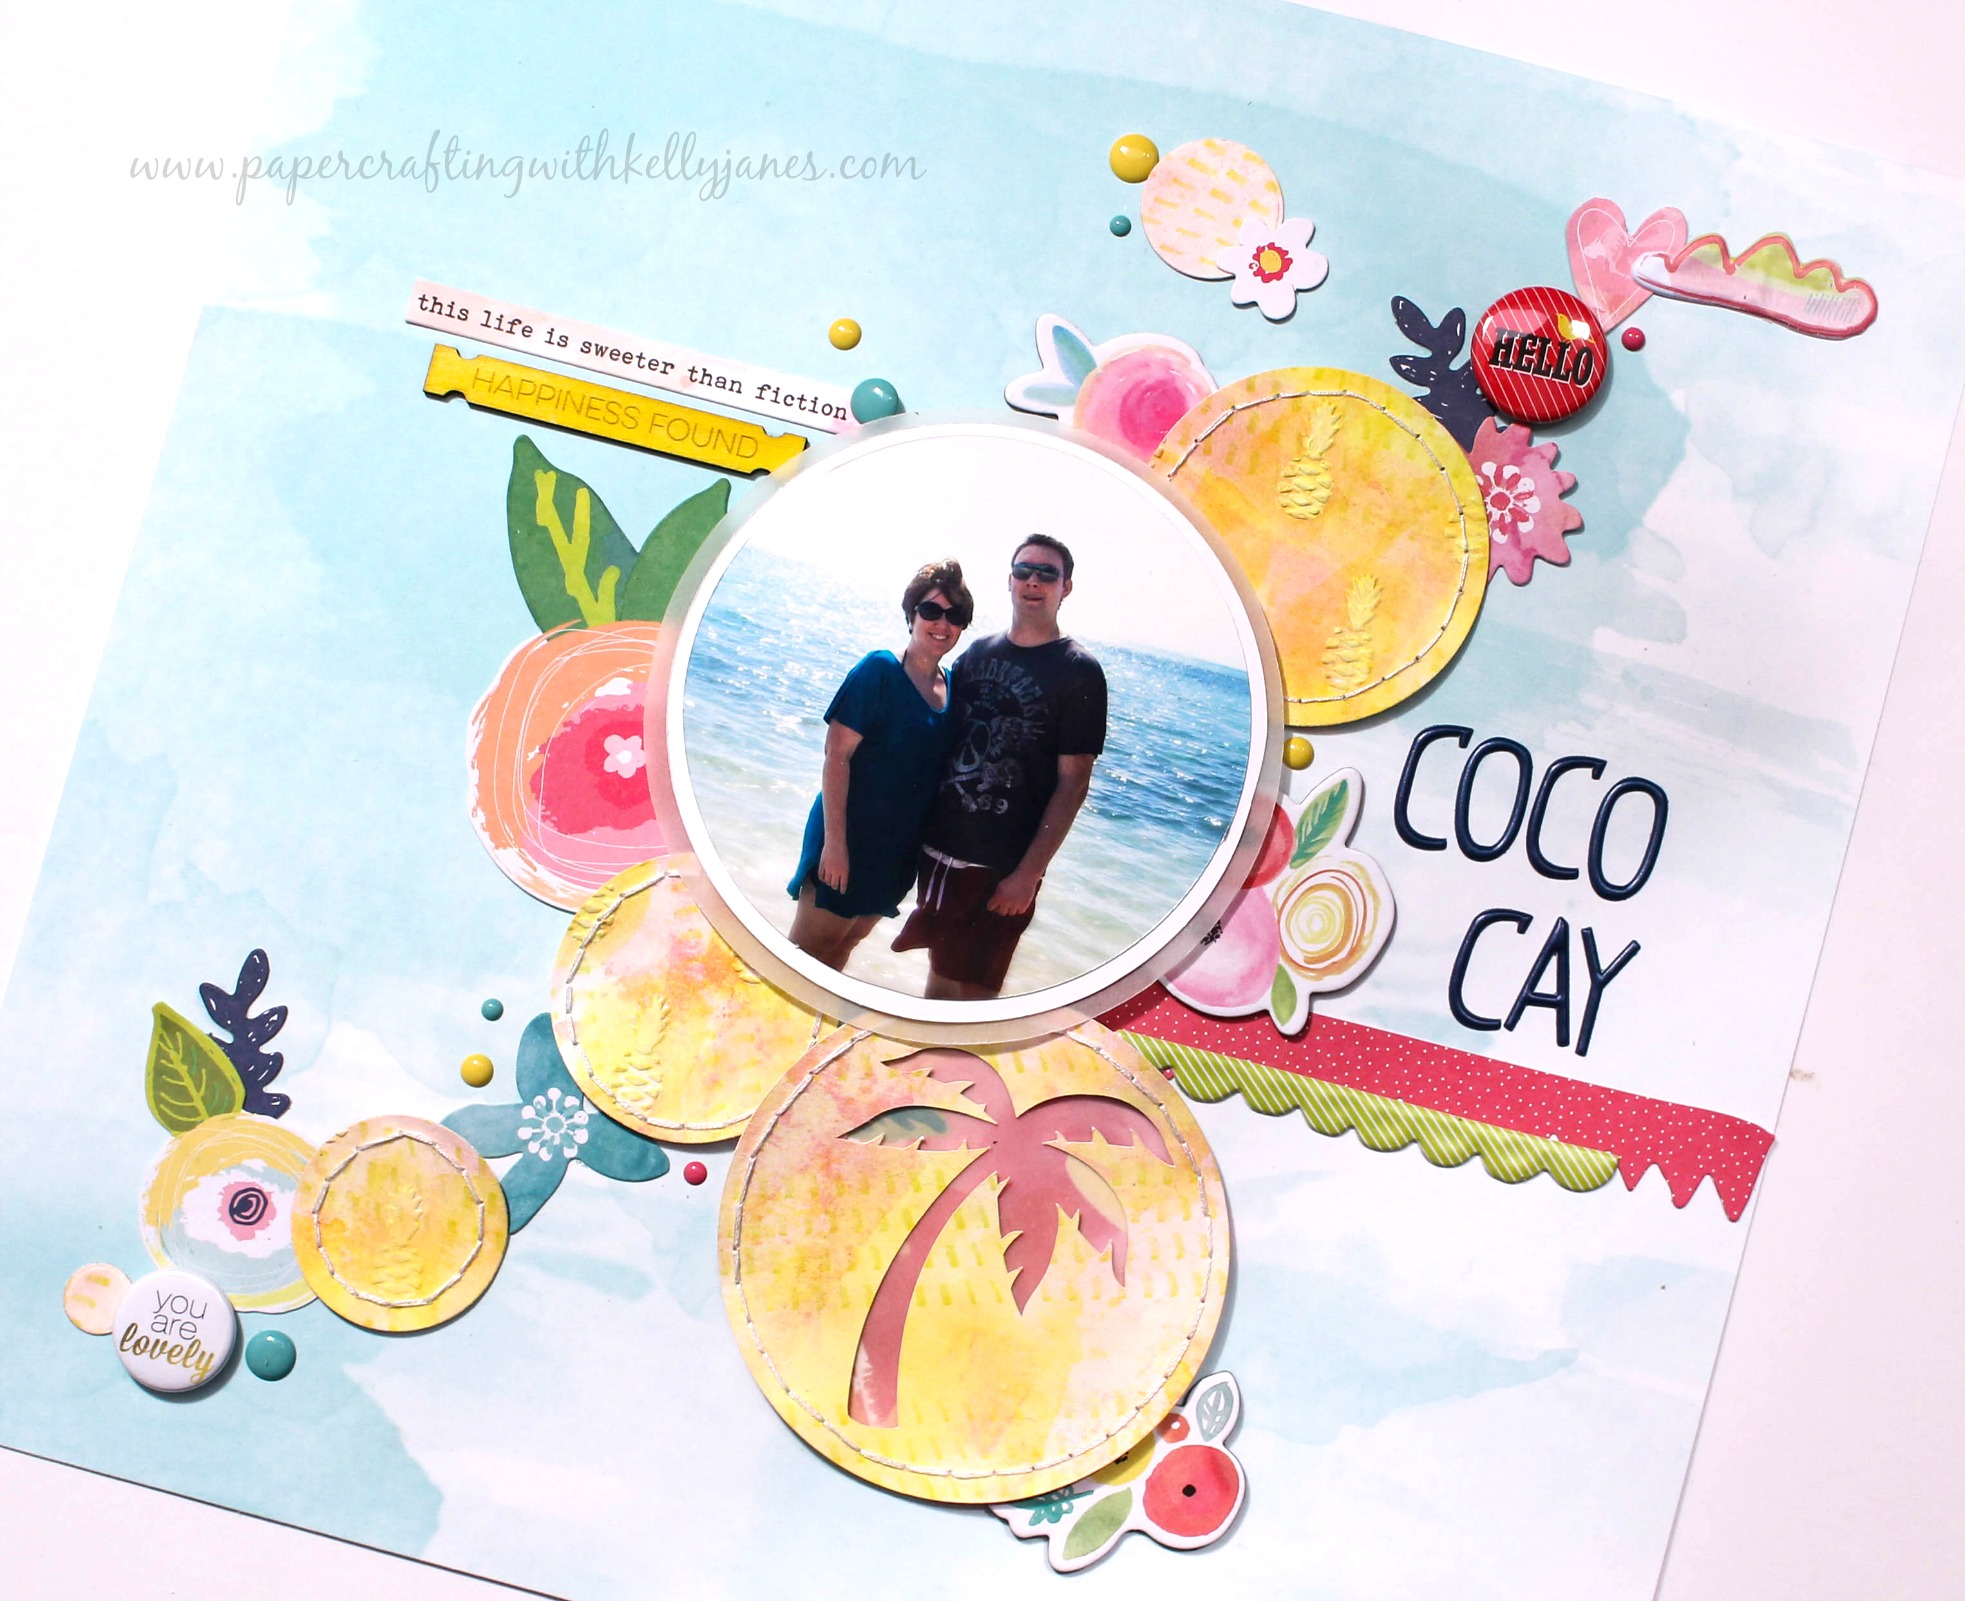
I knew I wanted to use the June Hip Kit Club Sketch for my layout…
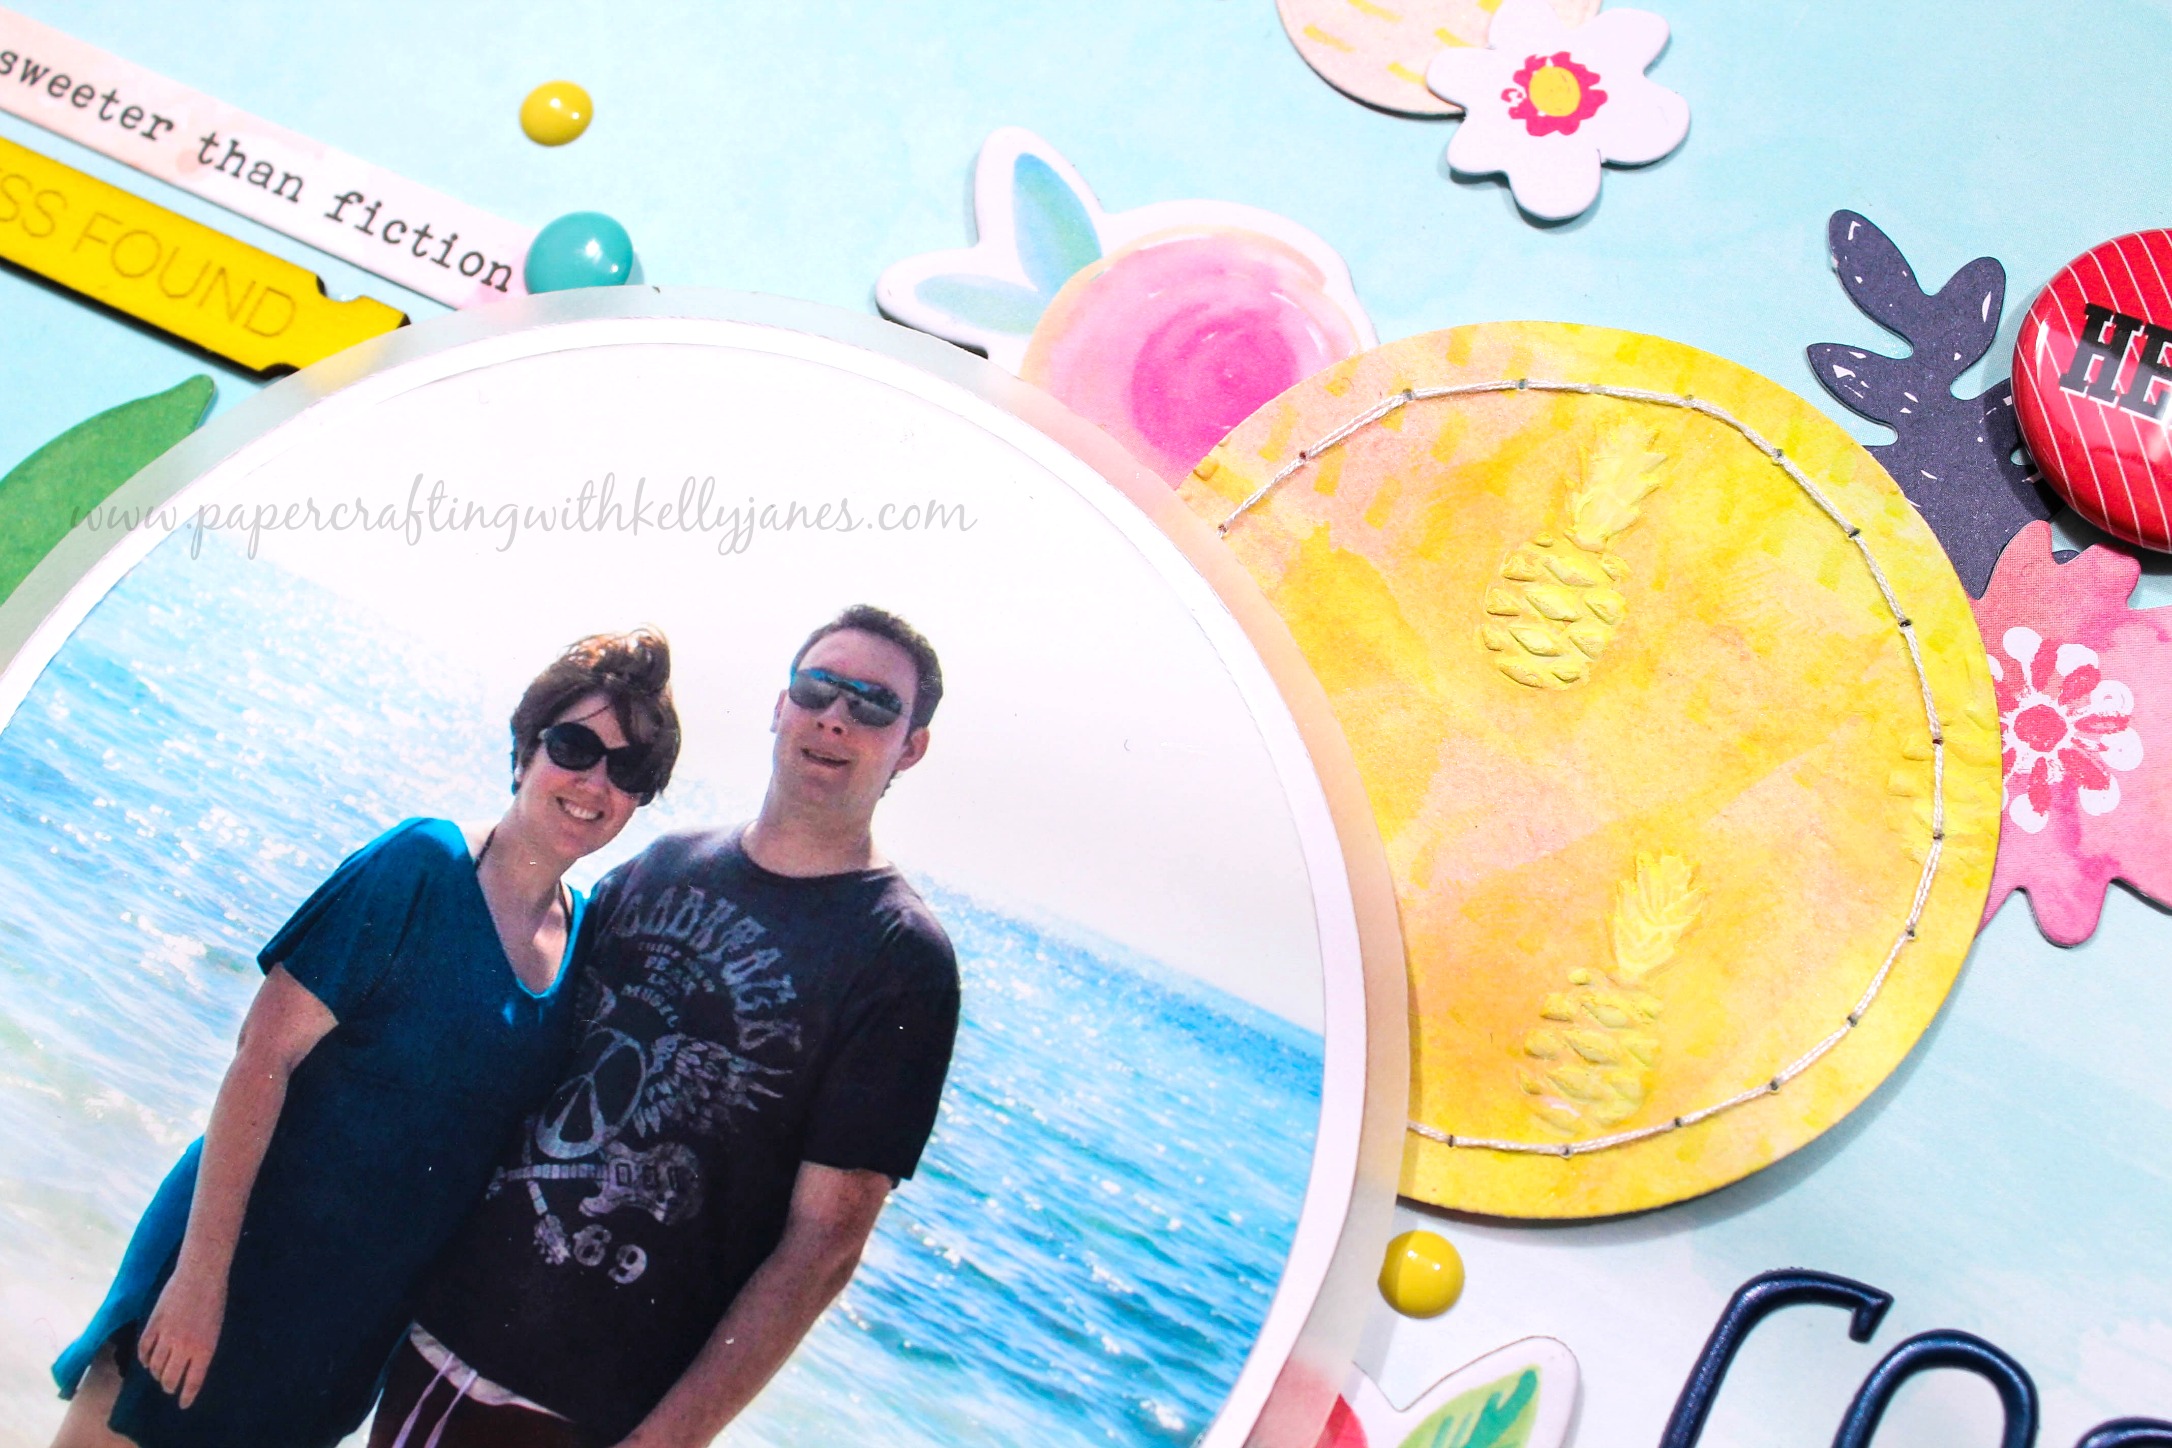
For my background I grabbed a blue pattern paper, also from Hip Kit Club, that almost has a watercolor effect. The paper I used for the circles was a patterned paper that I had intended to use on another project, but I didn’t like the way the mixed media looked so I saved it just in case I could find another use for it. I cut multiple size circles out of the mixed media paper using circle dies from Big Picture Classes. After the circles were cut I used a Pink Paislee pineapple dry embossing folder on each of the circles. Unfortunately the embossing wasn’t as noticeable as I had intended so I grabbed white acrylic paint and white washed the pineapples. Then they were too bold so I grabbed a Shimmerz Spray, No Yoking Coloringz, and added a little color to each of the pineapples using my finger.
I struggle with using circles on my layouts. I have a hard time making them look random and organized at the same time so I followed the sketch pretty much to the letter. I added hand stitching to each of the circles and I also cut a palm tree on one of the large circles using the Artbooking Cricut® Cartridge. I backed the palm tree using a layer of vellum & a pattern paper from the Bella Blvd-She Blooms Collection.
I added flowers & stickers from Bella Blvd & Hip Kit Club. I added a few enamel dots from Pinkfresh Studio and My Mind’s Eye. I also added a couple flair buttons; the top pink “Hello” is from Hip Kit and the bottom “You are Lovely” is from Feed Your Craft. I added a wood veneer piece from Elle’s Studio that I colored using the No Yoking Coloringz and a tiny phrase sticker from Pinkfresh. My title comes from a navy, puffy alpha set from Hip Kit Club.
I’ve created a process video showing how all of this came together!
Now it’s time to head to Becca Whitham’s blog! She’s an amazing papercrafter and I know you’ll love what she has to share!