Atlantic Hearts DT Debut

I’m so excited to announce that I’ve been selected to join the Atlantic Hearts Sketch Challenge design team. This is my first week showcasing my artwork as a design team member and I’m hoping that you’ll pop on over to join the challenge!

Here is the sketch this week:

AHSC

And here is my interpretation:

CTMH: AHSC

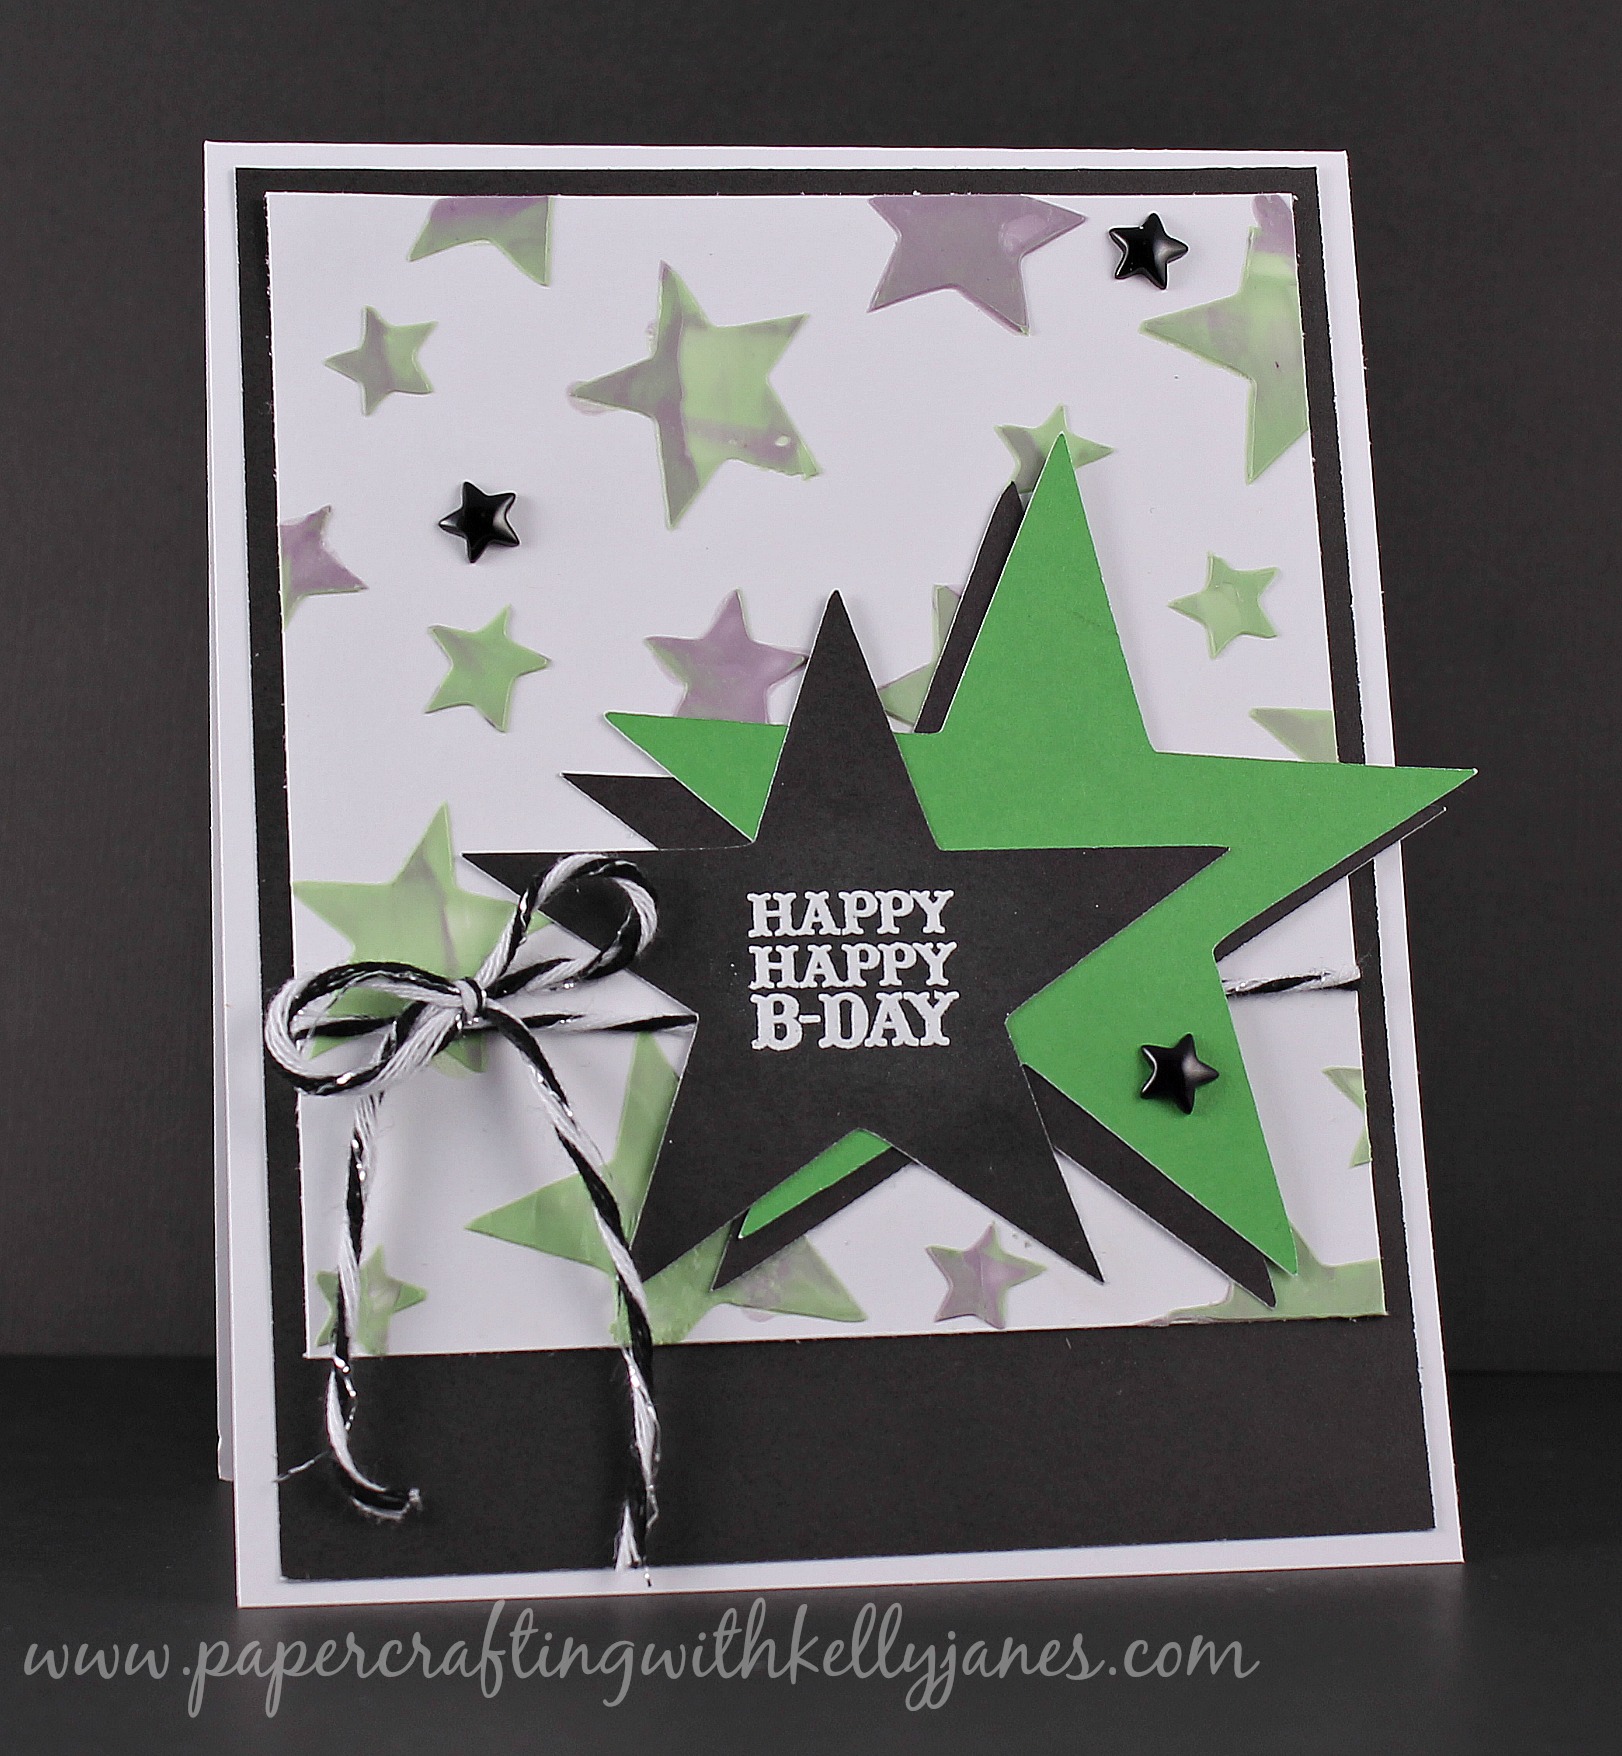
As many of you know, I’m not a Valentine’s Day celebrator, so when I saw the hearts on the sketch I knew I would switch it up somehow. I liked the idea of stars and creating a birthday theme, so I went through my stash of stencils annnndddd realized I don’t have a star stencil. So I grabbed the Artbooking Cricut® Cartridge and created one using the overlay feature on a scrap piece of cardstock. I then used my craft mat and smooshed my Black Exclusive Ink™ Pad & Topiary Exclusive Ink™ Pad directly onto the craft mat. I grabbed some modeling paste and mixed the ink colors into the paste. The colors were more muted than what I had hoped; I think if I had used re-inkers instead of the ink pads I could have made a more vibrant, rich, crisp color but I was fine with how they turned out. Once I had the modeling paste and ink mixed well, I used a putty knife and spread it over the stencil on a piece of White Daisy Cardstock.

CTMH: AHSC

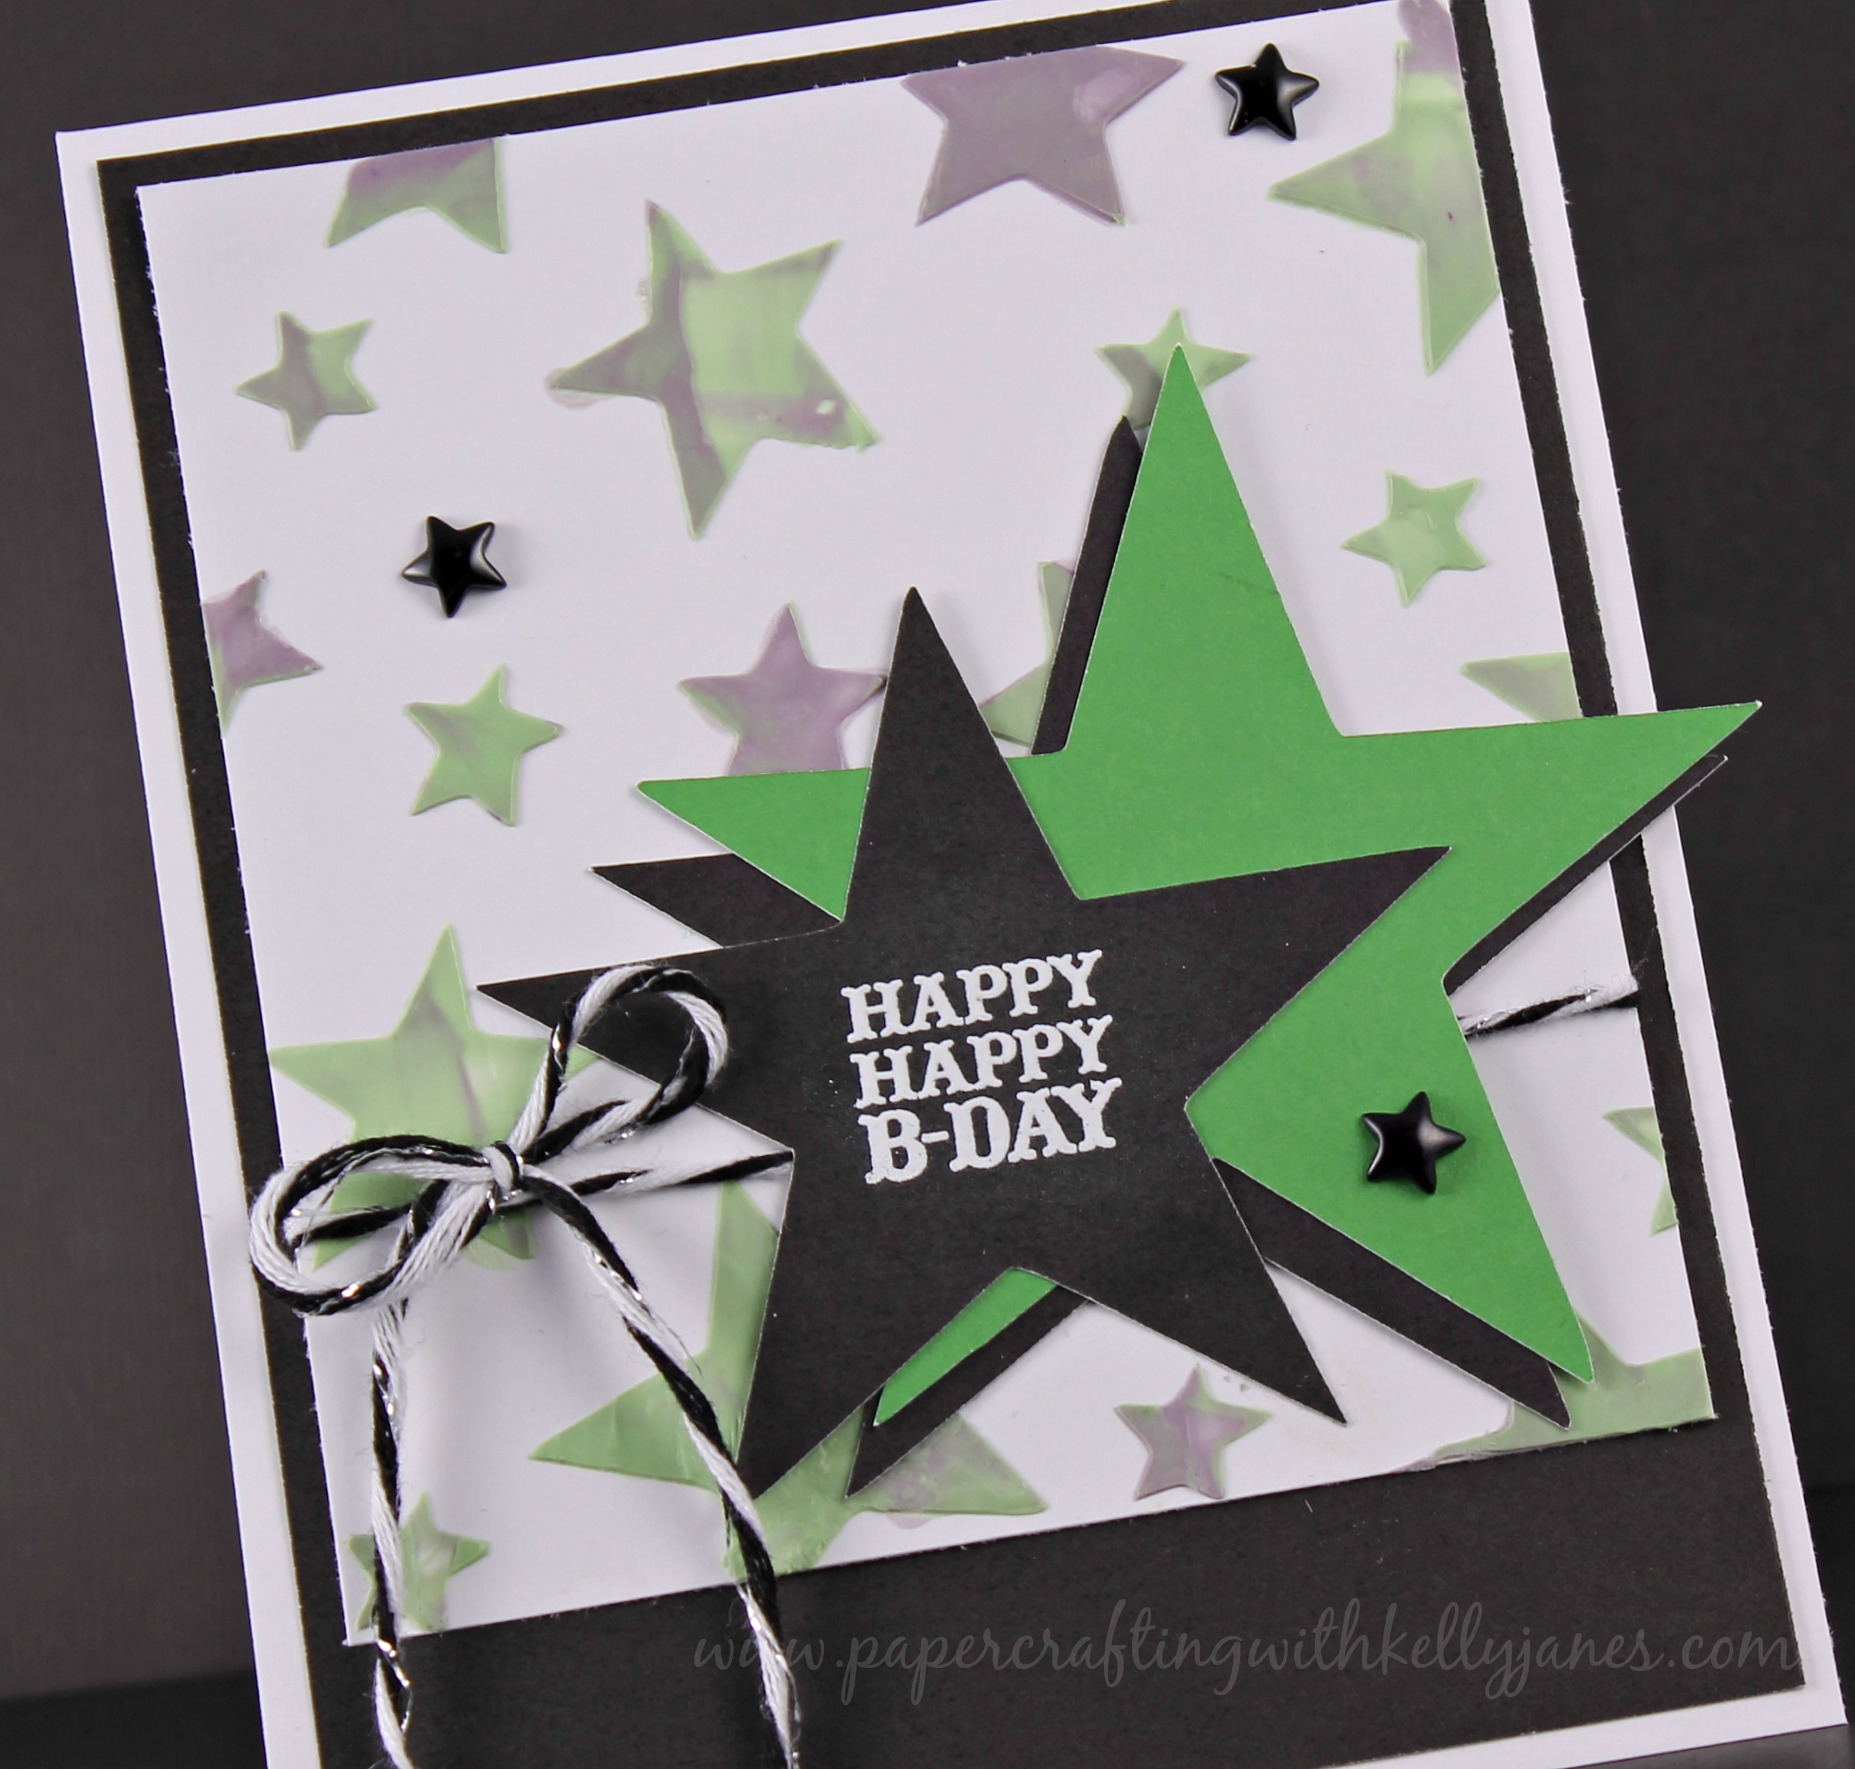
Once the modeling paste was dry {you can use a Craft Heater to speed this process up} I matted the the White Daisy Cardstock onto a layer of Black Cardstock. I cut multiple stars in Black Cardstock and Topiary Cardstock using the Art Philosophy Cricut® Cartridge. I tied a piece of Baker’s Twine onto the card and then layered the paper stars. On the top star I used Versamark™ Ink and White Embossing Powder with the Big Top Stamp Set for the sentiment. After I had all the layers down I added a few black resin stars that are available in the Scaredy Cat Assortment.  I had planned on adding some white stitching around the black cardstock base, but I broke the needle on my sewing machine—BOO!! You can cry with me if you like!!

Now head on over to the AHSC Blog to link up your card using this week’s sketch!
-Kelly

A Happy Hello Blog Hop

Welcome to our Stamp of the Month blog hop! This month nearly 70 consultants are showcasing artwork using February’s SOTM, A Happy Hello. If you’ve come from Judy Burger’s Blog you are in the right place. If you’ve started here-you are also in the right place! This blog hop is a giant circle so to make your way around simply click on the link at the bottom of my post to take you on to the next consultant. If you happen to get lost along the way -you will find a complete list of participants on Melinda Everitt’s Blog.

I’m not a flower stamp kinda gal so this stamp set was really a struggle. So much so that I considered not participating in this month’s hop, BUT I’m not one to back down from a papercrafting challenge so I headed to Pinterest & Bloglovin’ for inspiration! I came across a card by Lea Lawson and loved the design. I knew I could use the flower stamps without over empowering the card. I used the Brushed Paper Packet & coordinating ink colors {Hollyhock, Canary, Pixie, Flaxen and Pear}. I created masks of the flowered images using yellow sticky notes and started stamping away on a piece of White Daisy Cardstock. I then layered multiple B&T Duos™ and added some stitching to each layer. I LOVE stitching. It adds so much character to a card!!

CTMH: Feb SOTM

The sentiment also comes from A Happy Hello Stamp Set, but I wanted it to be a little bolder from the Hollyhock Ink I had used on the flower. So I used the Hollyhock Pigment Ink, which is included in the Adventures Exclusive Inks™ Mini Pigment Pads Set, and then sprinkled & heated Clear Embossing Powder over the sentiment. When using the embossing powder it adds more depth and shine to the color of the sentiment and really helped it stand apart from the rest of the card. I needed to add a little bling to the card but didn’t want to use ordinary clear sparkles. I didn’t have anything else in my stash so the ShinHan™ Touch Twin™ Golden Yellow Marker to the rescue! I simply colored the Clear Sparkles while they were still on their carrier sheet to give them the yellow tint! Perfect custom embellishment! After all the pieces were together I adhered the white cardstock onto a piece of Hollyhock Cardstock.

CTMH: Feb SOTM

febsotm

Remember this stamp set is only available until February 28 and it can be yours for only $5 with a qualifying order! Contact your CTMH consultant or click here for more information and to shop now! Now it’s time to head to Donna Digby’s Blog to see what she has created using this fun stamp set!

-Kelly