Hey friends! I’m back today to share a layout I recently created for The Cut Shoppe using the Pretty Pottery Cut File.

I started in Cricut Design Space by “ungrouping” the cut file and selecting two of the pots. I then welded them together to create on image. After the images were welded together, I duplicated the image and used the contour feature to “hide all” contours to create a solid image. This allowed my Cricut to cut the paper I used to back the more intricate cut file. [You will find a step-by-step Cricut tutorial in the process video at the bottom of this post.]
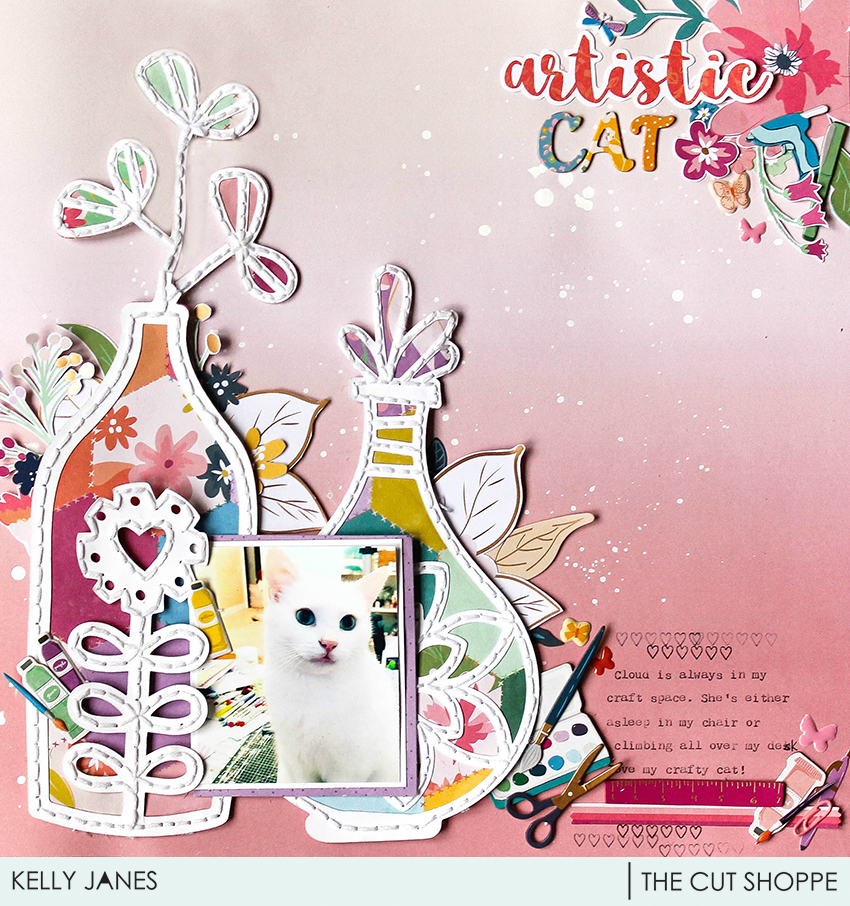
I cut the intricate cut file on white cardstock and used Patterned Paper #5 from the Pink Paislee Paige Evans Whimsical Collection to back the cut file. I love that I was able to get a wide variety of colors by just using the one paper! It saved so much time by not have to fussy cut each individual area with multiple patterned papers.

I added white hand stitching to the cut file for added texture and then moved onto embellishing. I really debated on which patterned paper to use as my background, but ultimately decided on Patterned Paper #17 from the Whimsical Collection. I tucked numerous fussy cut leaves and flowers from Patterned Paper #3 behind the Pretty Pottery and also added a fussy cut flower cluster, from the same patterned paper, to the top right corner of the layout. [All the patterned papers used on this layout can also be found in the Whimsical 12×12 Paper Pad.]

I added multiple Chipboard Thicker Icons, Puffy Stickers, flowers from the Sticker Book, Enamel Shapes and Floral Die Cuts around the layout. I wanted to get as much color and texture as I possible could. <<< I think I achieved this goal! HA!

For my title, I grabbed the word “Artistic” from the Whimsical Die Cut Pack and letters from the Whimsical Alpha Chipboard Thickers to spell out the word “Cat”. This layout is all about how my cat LOVES my craft room. I’d say she spends 75% of her day in my craft room. She loves sleeping on my chair, looking out the windows, batting things off my desk, and walking across my projects as I’m working. She’s such a sweet, pretty girl! I decided to nestle the photo in with the pots, but I wanted to draw a little more attention to the photo, so I added a Die Cut frame as a layer behind the photo.

Oh, I forgot to mention that before I adhered everything down, I did add white splatters to the background using Dylusions White Linen Mist. I was very impressed with this mist! It stayed very much true to color which is awesome, because most white mists I’ve tried dry translucent. I also added my journaling using my We R Memory Keepers Typecast Typewriter before adhering anything to the background. I’m still so in love with that typewriter! It’s the 2nd most used tool in my craft room [only 2nd in line to my Cricut].

Now you can take a look at my process video which includes a Cricut Design Space tutorial.
Have you visited the new Cut Shoppe Store? You really need to! All of the cut files now come in SVG format, which means no more slicing the cut files apart for us Cricut users! We can just ungroup and move along our merry way! YAY!!

